General
Set up and configuration
Manage users
Troubleshooting
Registers
Manage content
- Delete document
- Edit, review and approve process
- Edit, review and approve policy
- Create and publish new policy
- Create and publish new process
- Previous item version information
- Edit roles
- Edit release notes
- Hide items (archive content)
- Introduction to release management
- Manage document
- Manage regulations
- Publish multiple changes (in one release)
- Publish single item (manage changes)
- Download and print content
- Delete role
- Delete policy
- Delete process
- Delete or archive regulation
Audits
Training Resources
Business units
- Guide new business unit set up
- Working example 1 - locking down content access to 2 separate items
- Working example 2 - want all staff to view content yet only one group can edit
- Existing business unit review and configuration
- Guide ongoing business unit maintenance
- Manage business units for registers
Reports
Required Reading
Work Instructions
Mobile Phone App
Comments
Register reports
QMS Users with the appropriate access levels can view the Registers and download reports from the Registers. Users with the following access levels can do this:
- Administrator
- Model Administrator
- Incident and Improvement Manager
There are various reports which can be downloaded from the Registers and each Register allows you to download either the Current items, Archived items or a combination of All items.
The instructions below can be used for any register, however in our example we will use the Incident Register.
Tip
Each report can be filtered as needed prior to downloading to adjust what is included in the report. Refer to Filter and sort content for more information.
Step 1
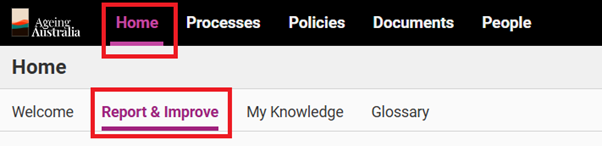
Open the Report and Improve tab to find the Registers.
Step 2
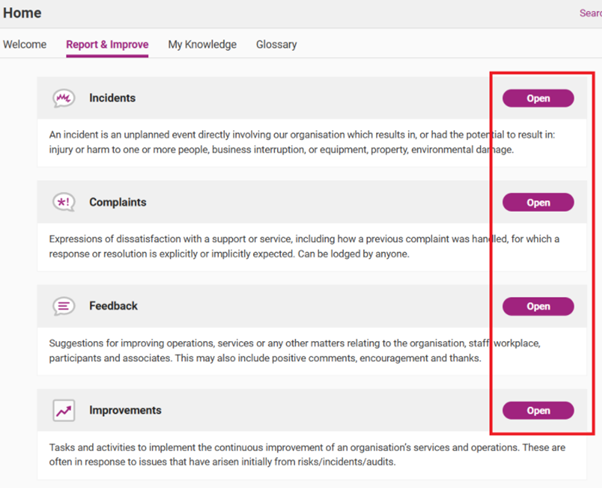
Go to the Register of interest by clicking Open for the Register you wish to get a report from.
Step 3
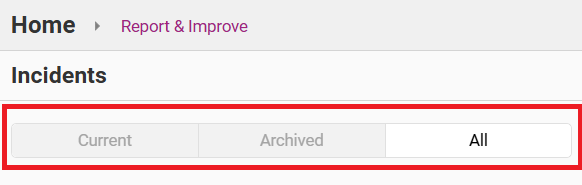
Click on either Current, Archived or All as applicable.
Step 4
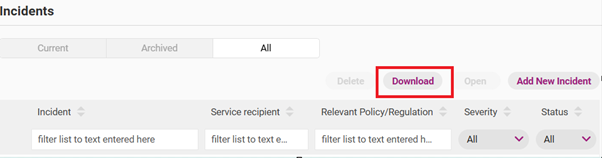
Click on Download.
Tip
You can filter and/or select the Register Items prior to downloading. Refer to Filter and sort content for more information.
Step 5
A Download Incidents pop-up box will emerge. Select the appropriate options under Create document from.
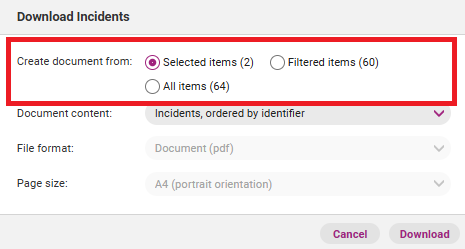
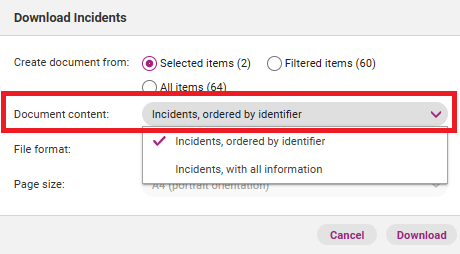
Step 6
Determine the file format of the report by using the drop down menu next to Document content.
- Incidents, ordered by identifier will result in a PDF file
- Incidents, with all information will result in a spreadsheet report
Step 7
Press Download then Open when the report is ready.