
General
Set up and configuration
- Assign required reading
- Manage app settings and notifications
- Home page image and document logo
- Manage categories
- Welcome text and news
- Hide items (archive content)
- Required reading reports
- Updating role name video
- Updating links to Strengthened Standards training video
- Onboarding kit
- Send email notifications
Manage users
Troubleshooting
Registers
Manage content
- Delete document
- Edit, review and approve process
- Edit, review and approve policy
- Create and publish new policy
- Create and publish new process
- Previous item version information
- Edit roles
- Edit release notes
- Hide items (archive content)
- Introduction to release management
- Manage document
- Manage regulations
- Publish multiple changes (in one release)
- Publish single item (manage changes)
- Download and print content
- Delete role
- Delete policy
- Delete process
- Delete or archive regulation
- Embed video
- Manage comments
- Send email notifications
- Show Remaining Articles (2) Collapse Articles
Audits
Training Resources
- Content updates training
- Process editing - editing the process sequence
- Upcoming training sessions
- Required reading training video
- Updating role name video
- Updating links to Strengthened Standards training video
- Scheduling updated audits video
- Work instructions training video
- Comments training video
Business units
Reports
Required Reading
Work Instructions
Mobile Phone App
Comments
Custom audits
Manage positions
Positions help determine a user’s responsibilities for specific content management activities within the QMS.
Positions can have responsibilities (Accountable, Approver, Owner, Reviewer) to items within QMS, which drives change management.
Create a Position
Step 1
Go to the People tab and access the Position.

Step 2
Click Add New Position.

Step 3
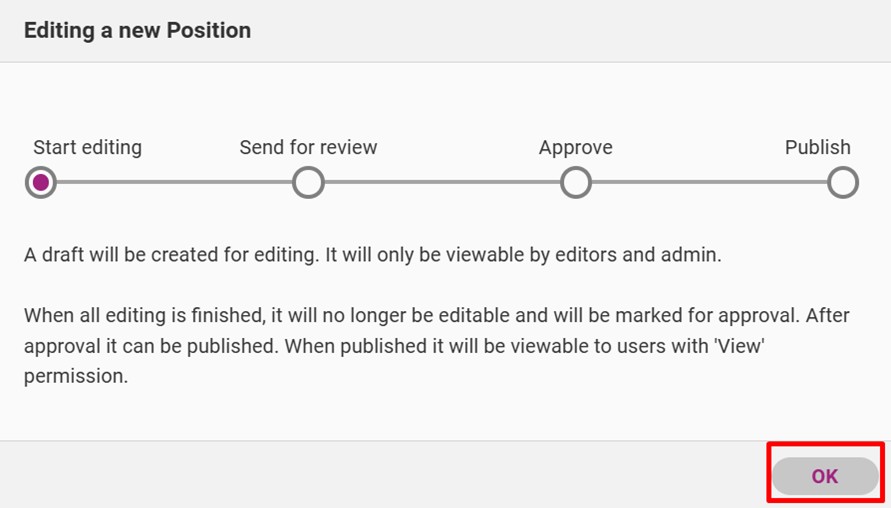
A release management workflow appears. Click OK to start adding a position.
Step 4
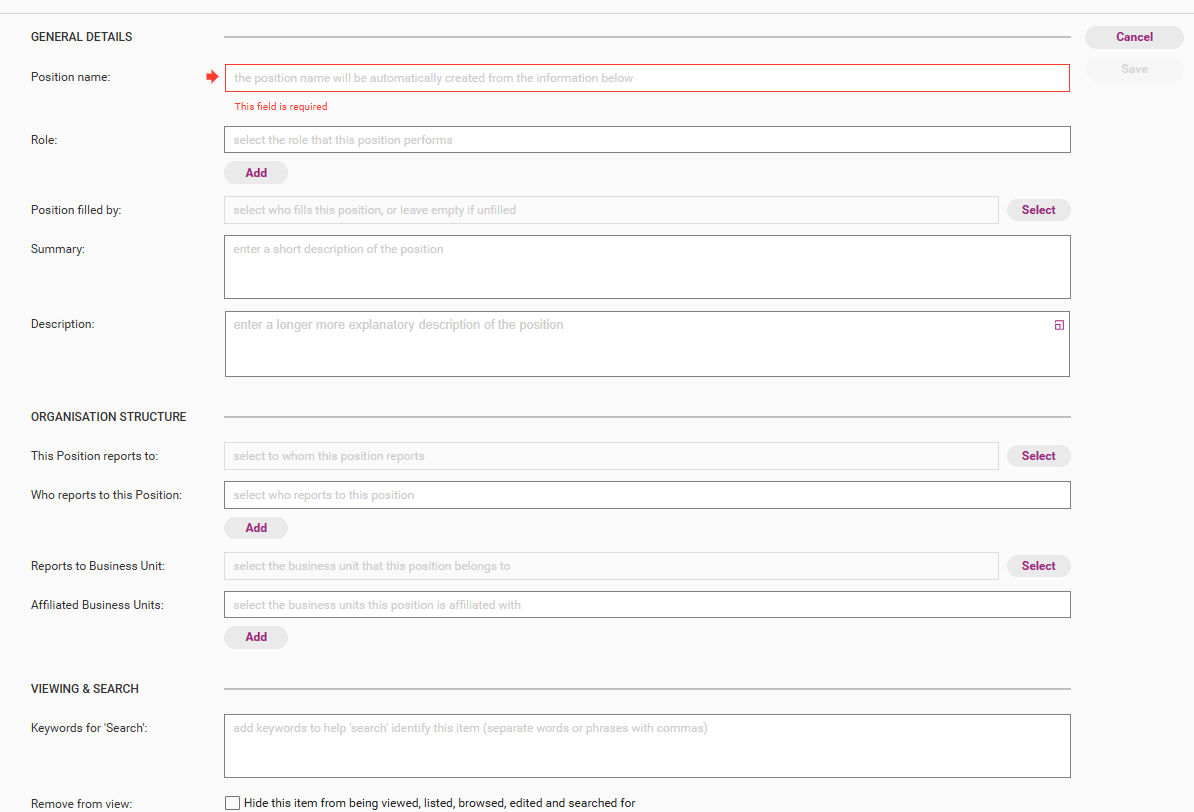
Enter information about the position and click Save when done and publish the position using the Release Management (RM) workflow.
Field | Description |
|---|---|
Position Name | Name of the position |
Role | Role that this position performs |
Position filled by: | Select a user or person who performs the position |
Summary | Short description of the position |
Description | An explanation of this position |
Business Unit | The Business Unit that manages this piece of content (applies only if you have Business Units implemented and wish to have visibility of the Policy restricted to users affiliated with the Business Unit) |
This Position Reports to | Who this position reports to |
Who reports to this Position | Who reports to this position |
Keywords for 'Search' | Tick this box to make this item required reading for all roles to which the item is relevant. |
Remove from view | Tick the box to hide the item. This will make the item only visible to users with Administrator permissions. Hidden items will:
Refer to Hide Items for more information. |
Item Responsibilities | Link any items of which the position is an Accountable, Approver, Reviewer, and Owner stakeholder.
|
Field | Description |
|---|---|
Position Name | Name of the position |
Role | Role that this position performs |
Position filled by: | Select a user or person who performs the position |
Summary | Short description of the position |
Description | An explanation of this position |
Business Unit | The Business Unit that manages this piece of content (applies only if you have Business Units implemented and wish to have visibility of the Policy restricted to users affiliated with the Business Unit) |
This Position Reports to | Who this position reports to |
Who reports to this Position | Who reports to this position |
Keywords for 'Search' | Tick this box to make this item required reading for all roles to which the item is relevant. |
Remove from view | Tick the box to hide the item. This will make the item only visible to users with Administrator permissions. Hidden items will:
Refer to Hide Items for more information. |
Edit a Position
Step 1
Go to the People tab and access the Position.
Step 2
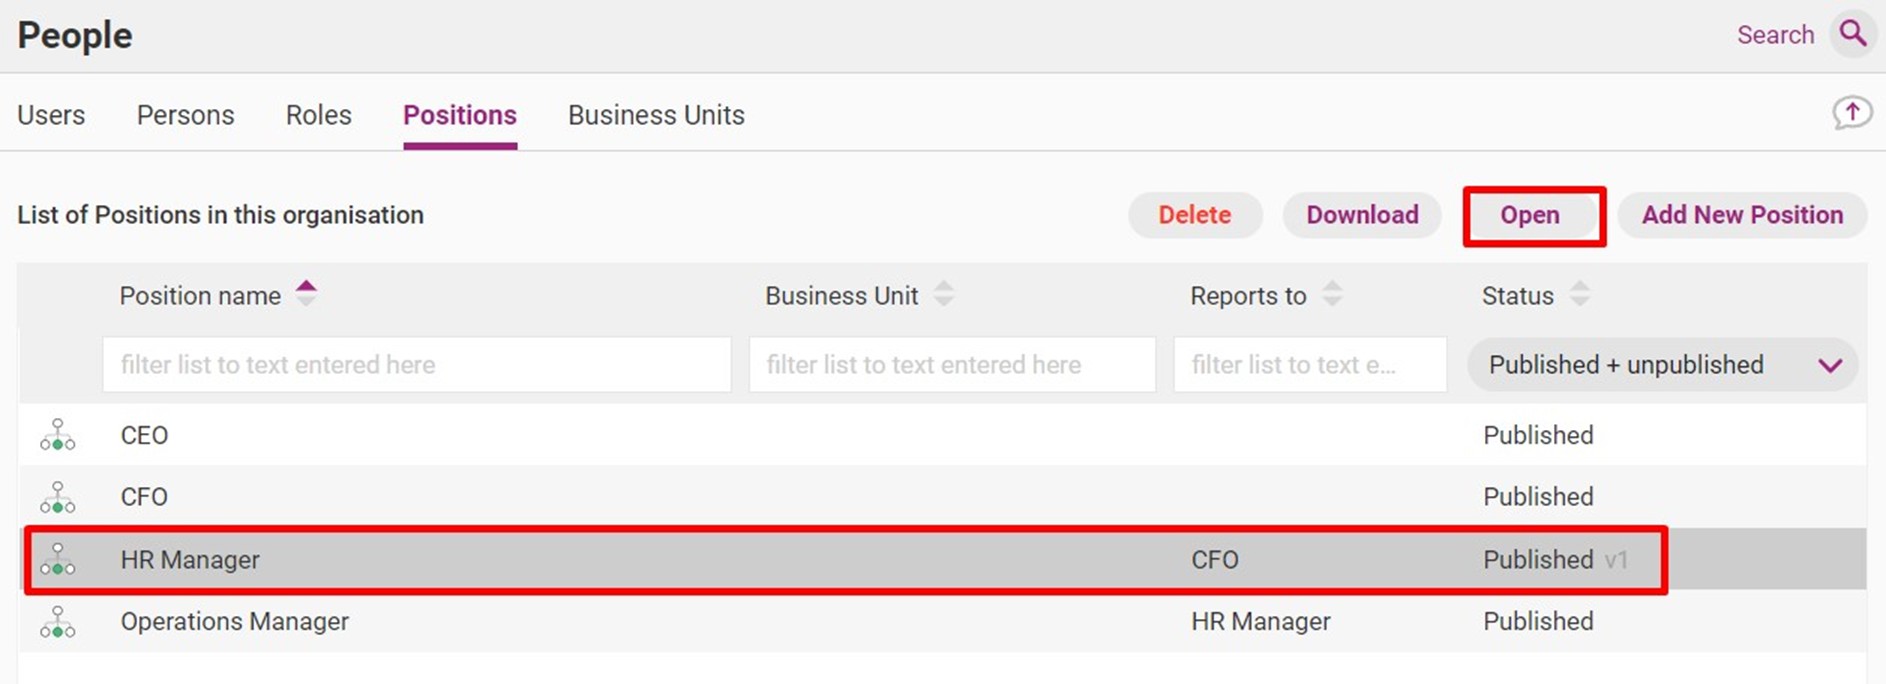
Click on the position you wish to edit and click Open.
Step 3
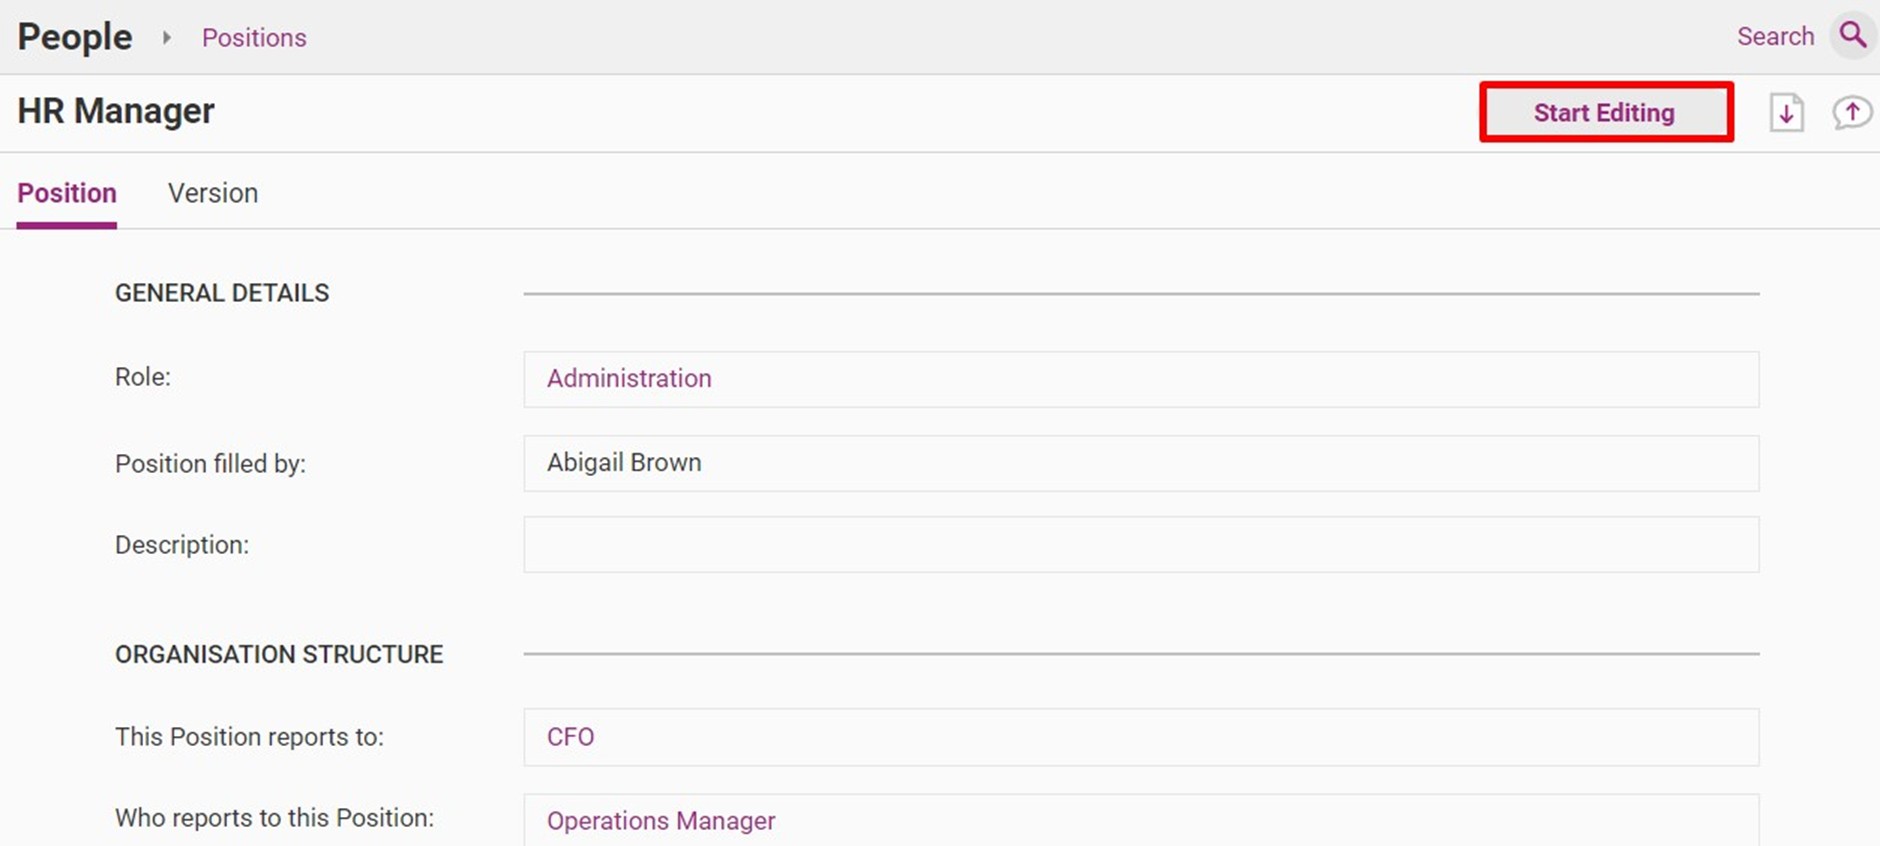
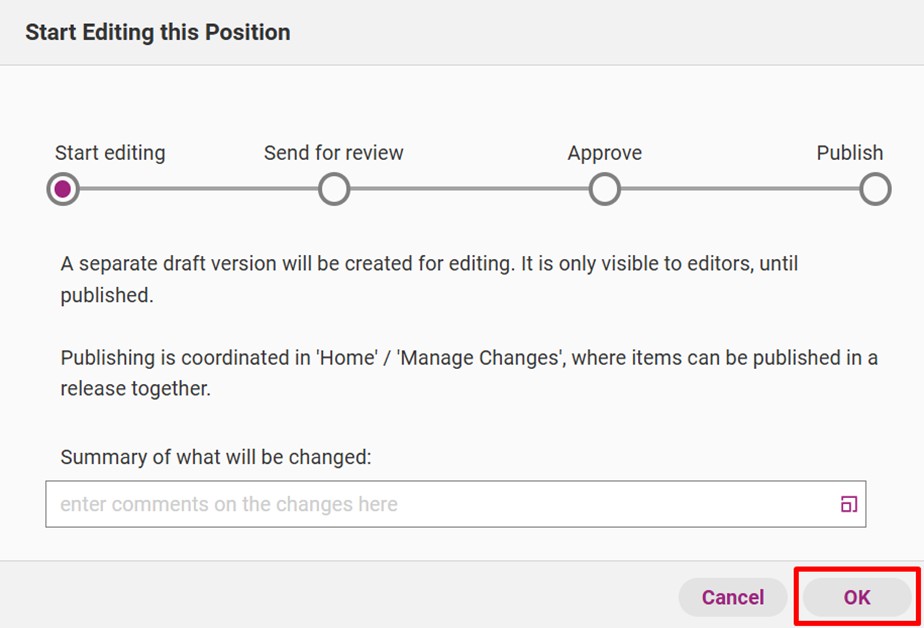
Click Start Editing, a release management workflow will appear. If the position is already marked 'Awaiting Approval' or 'Ready to Publish', open the position and revert to a draft so you can edit it.
Step 4
Write a summary of what will be changed. Click OK. This will mark the position as ‘Draft’.
Step 5
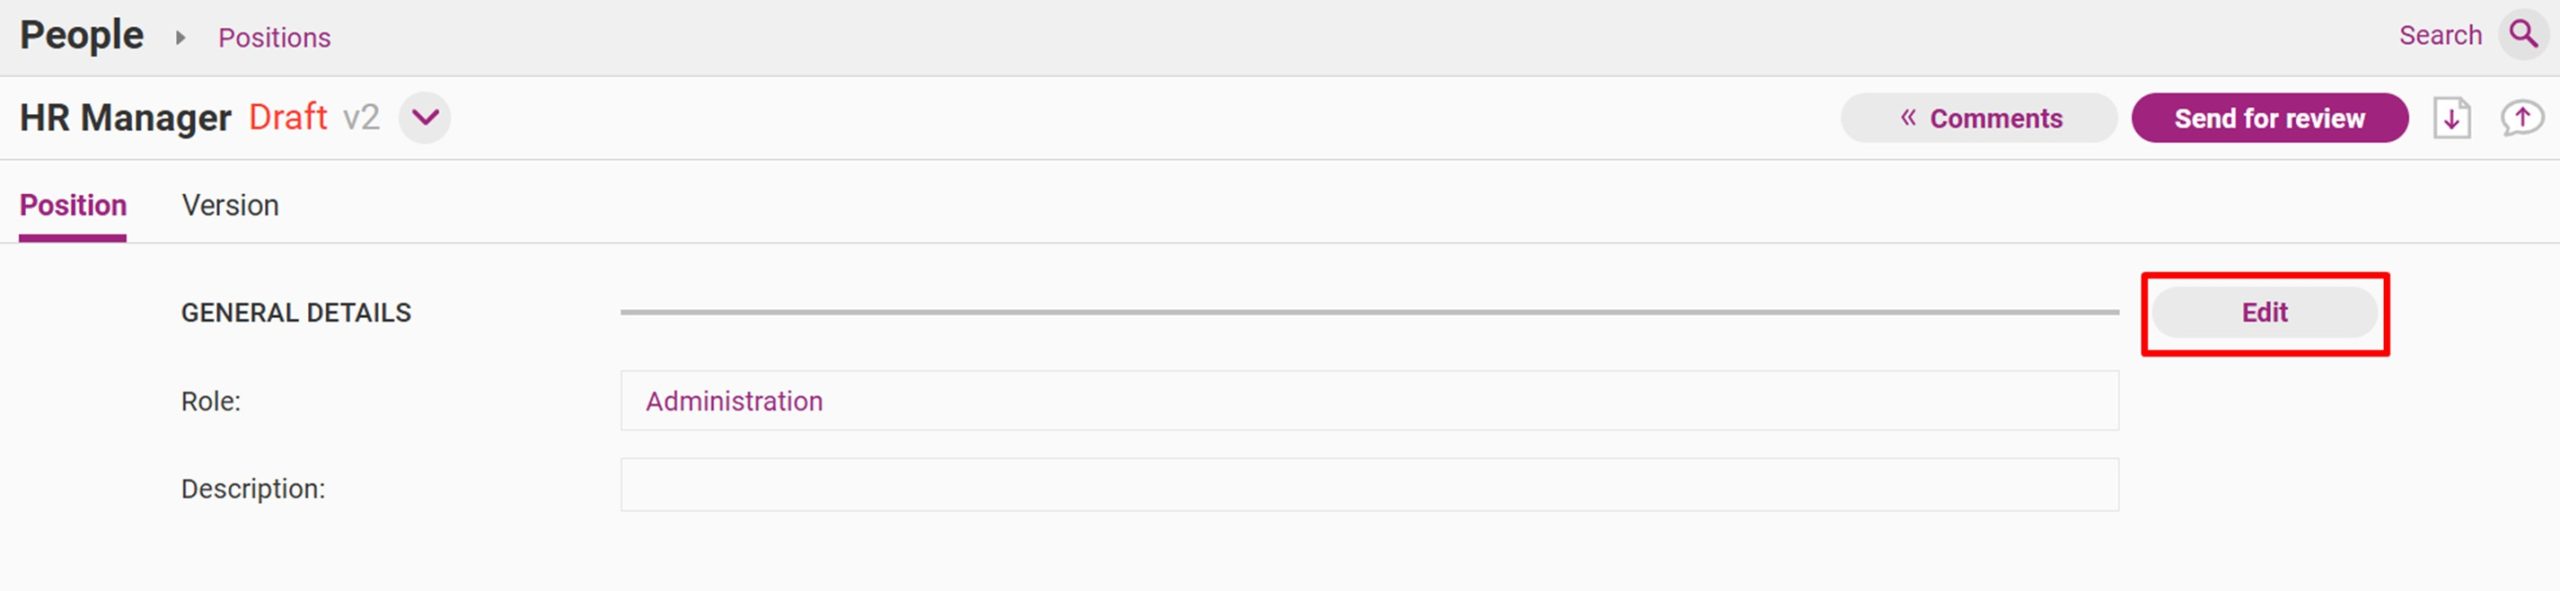
Click Edit.
Step 6
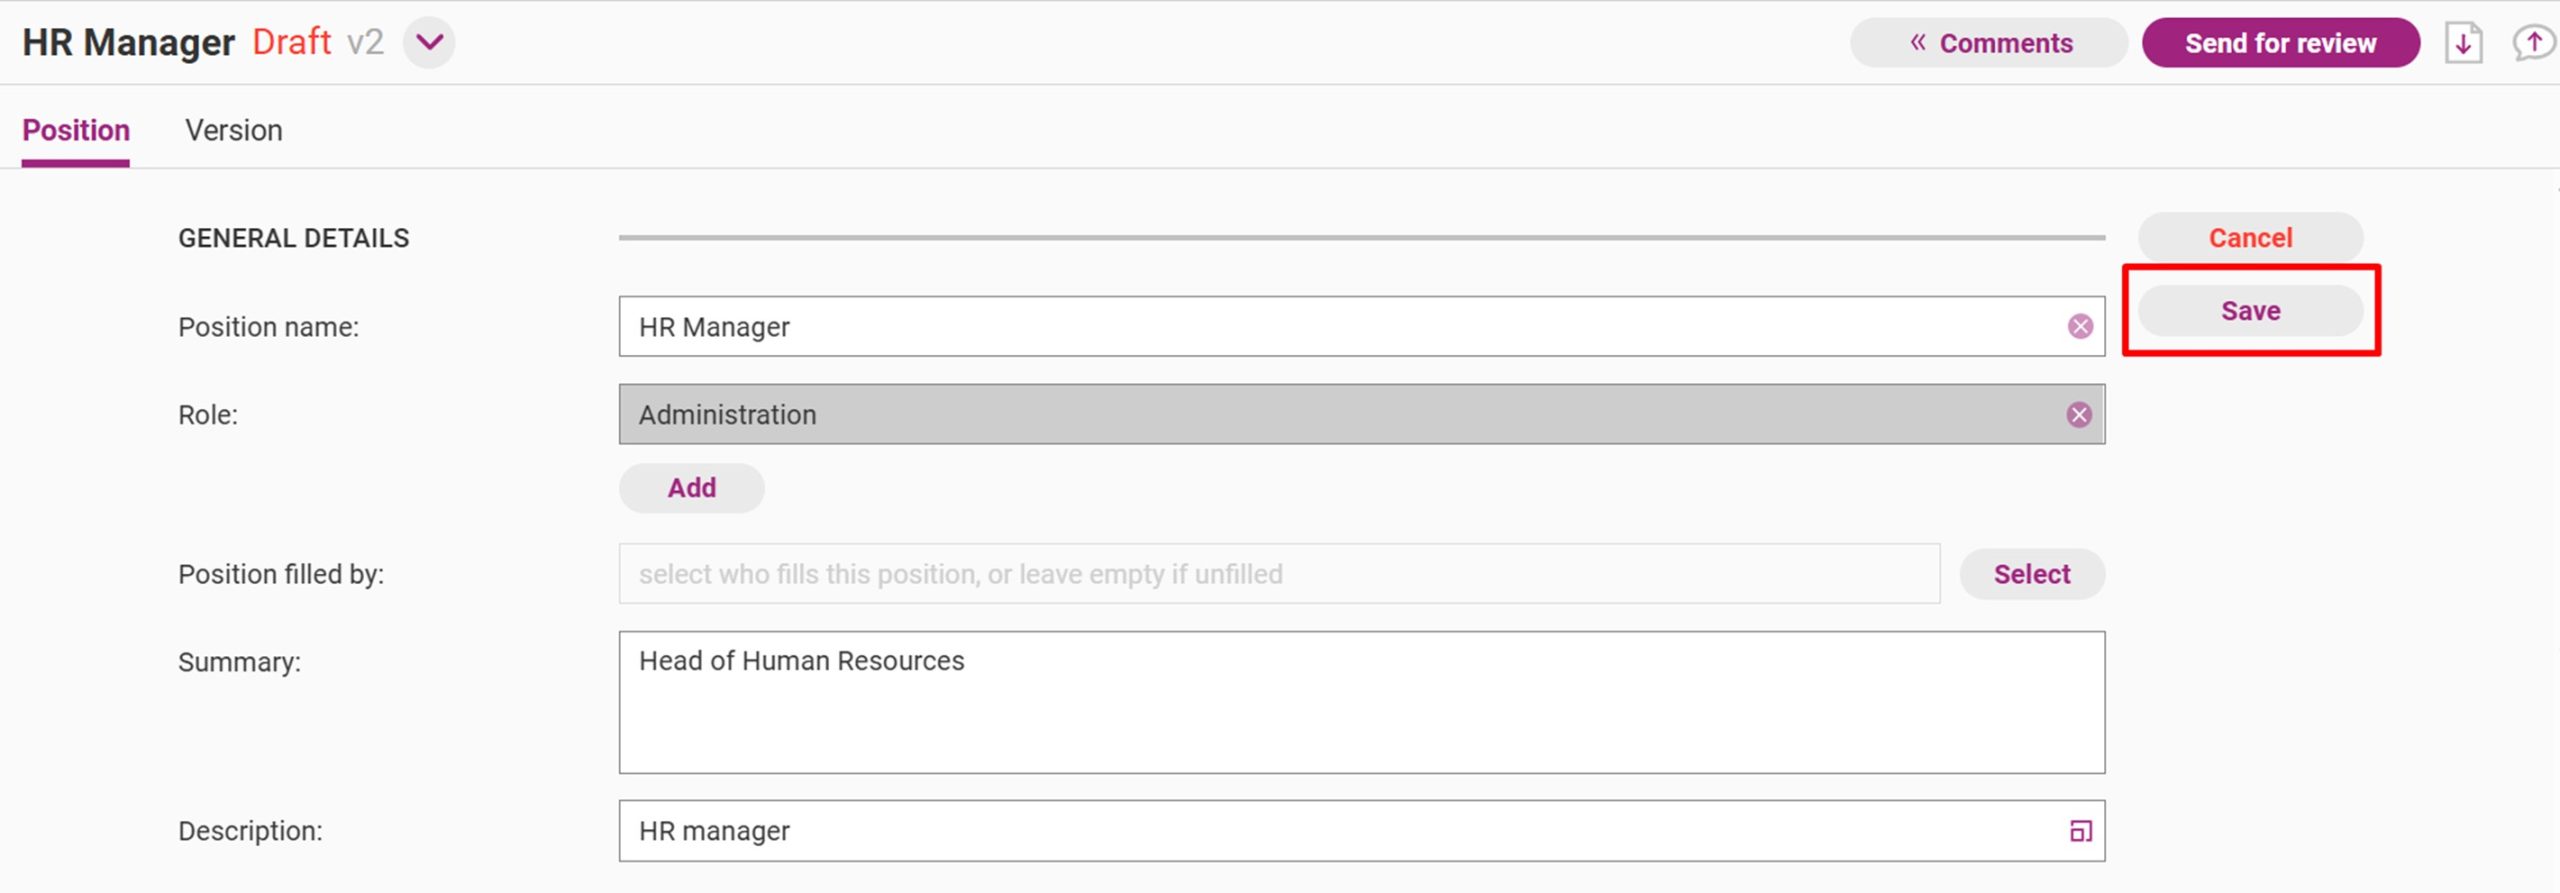
Make the necessary changes using the edit interface and click Save to commit the changes.
Approve and Publish a Position
Step 1
Go to the People tab and access the Position.
Step 2
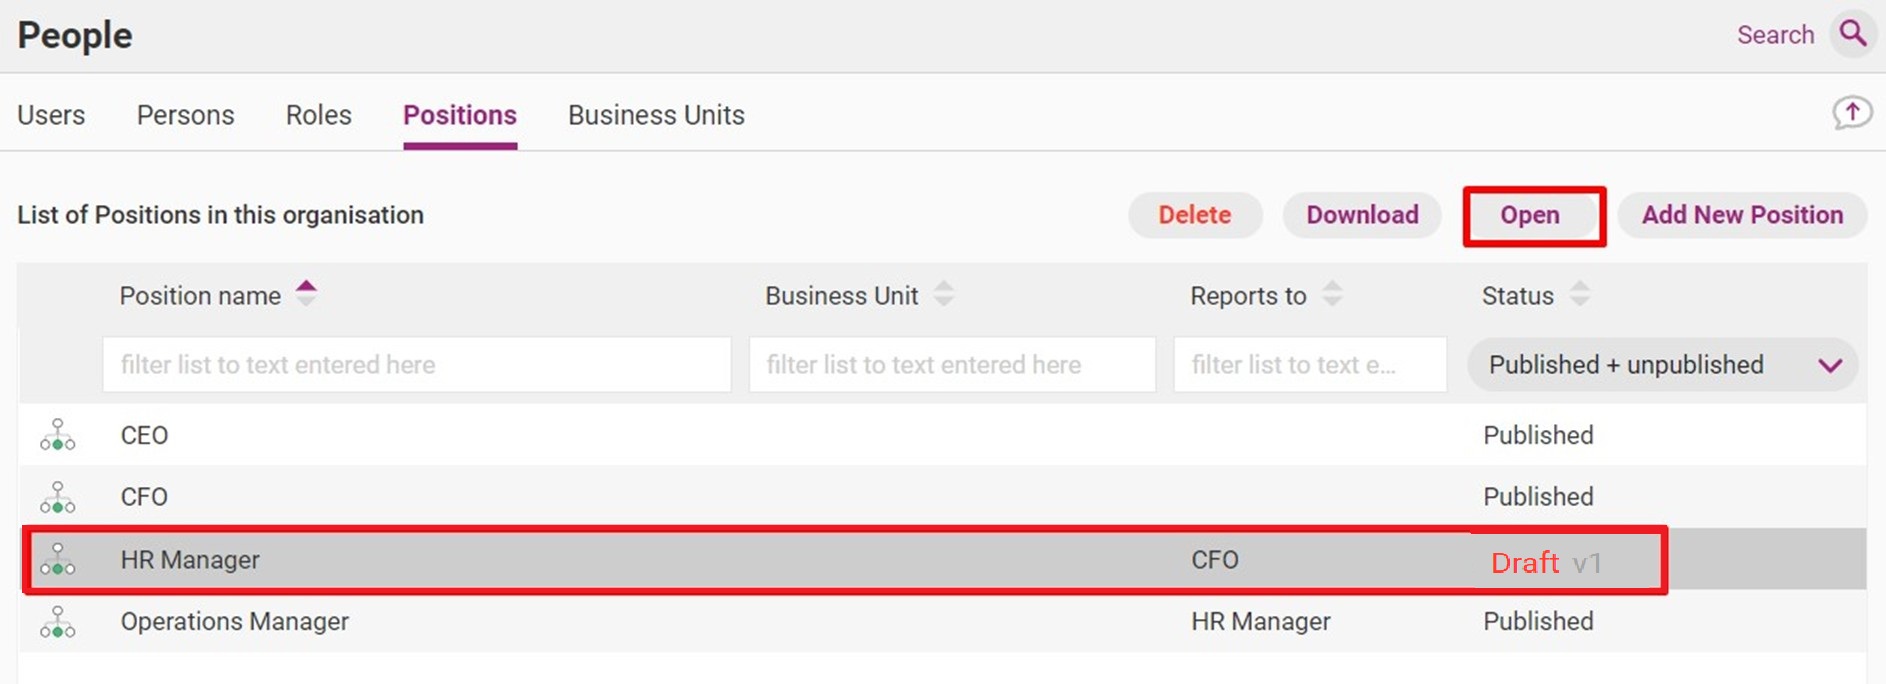
Click on the position you wish to edit and click Open.
Step 3
Click Send for review.
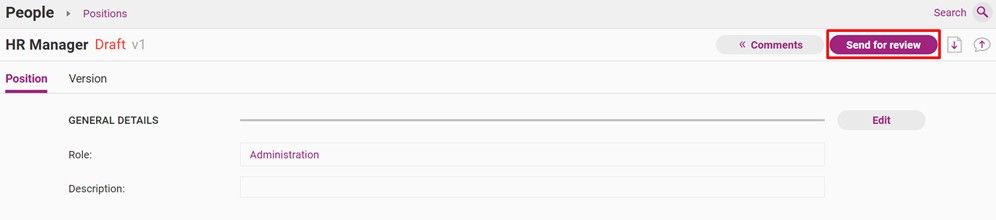
Step 4
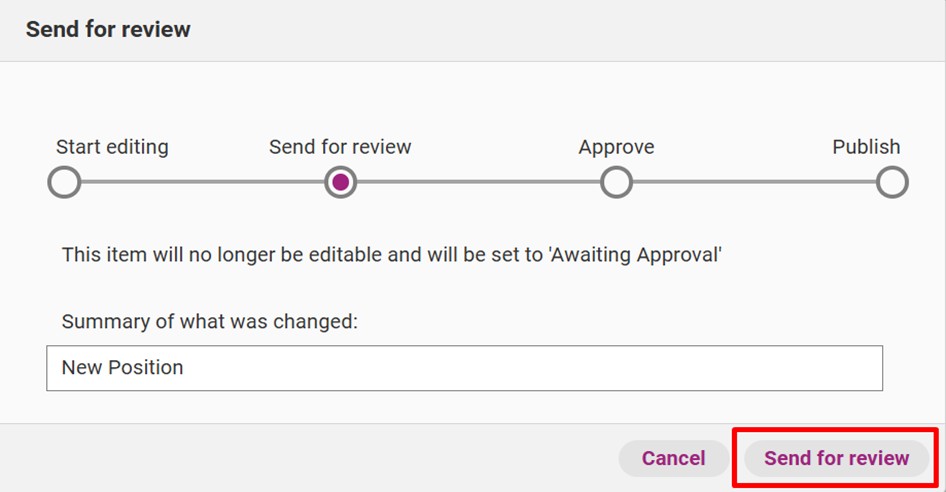
A release management workflow appears. Write a summary of what was added and click Send for review. The new position is now ready to be approved.
Step 5
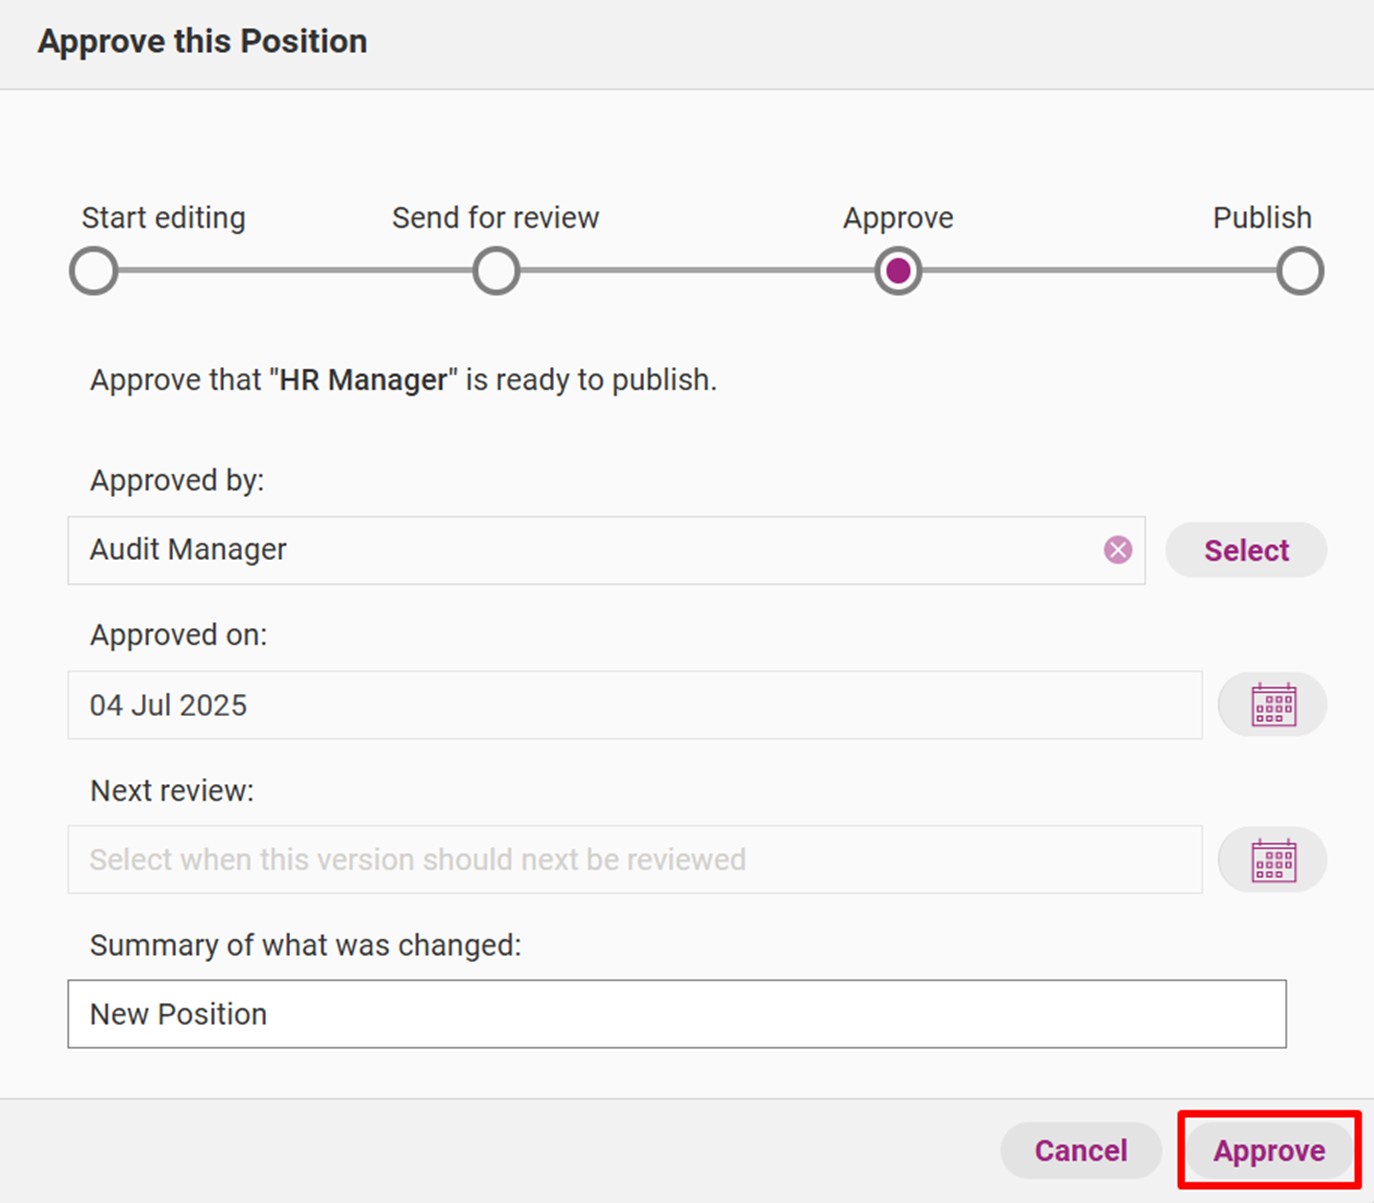
If you agree with all the changes, approve the new position by clicking Approve.
You will have the option to either approve the position or revert it to a draft (if you need to continue editing).

Step 6
Click Approve.
Tip
If the position is part of a larger release (i.e. a release with multiple content updates), leave it marked ‘Ready to Publish’. When you are ready, you can publish it at the same time as your other content updates by accessing the Home tab and clicking Manage Changes. Please see the guide Publish multiple items (in one release) for more information.
Step 7
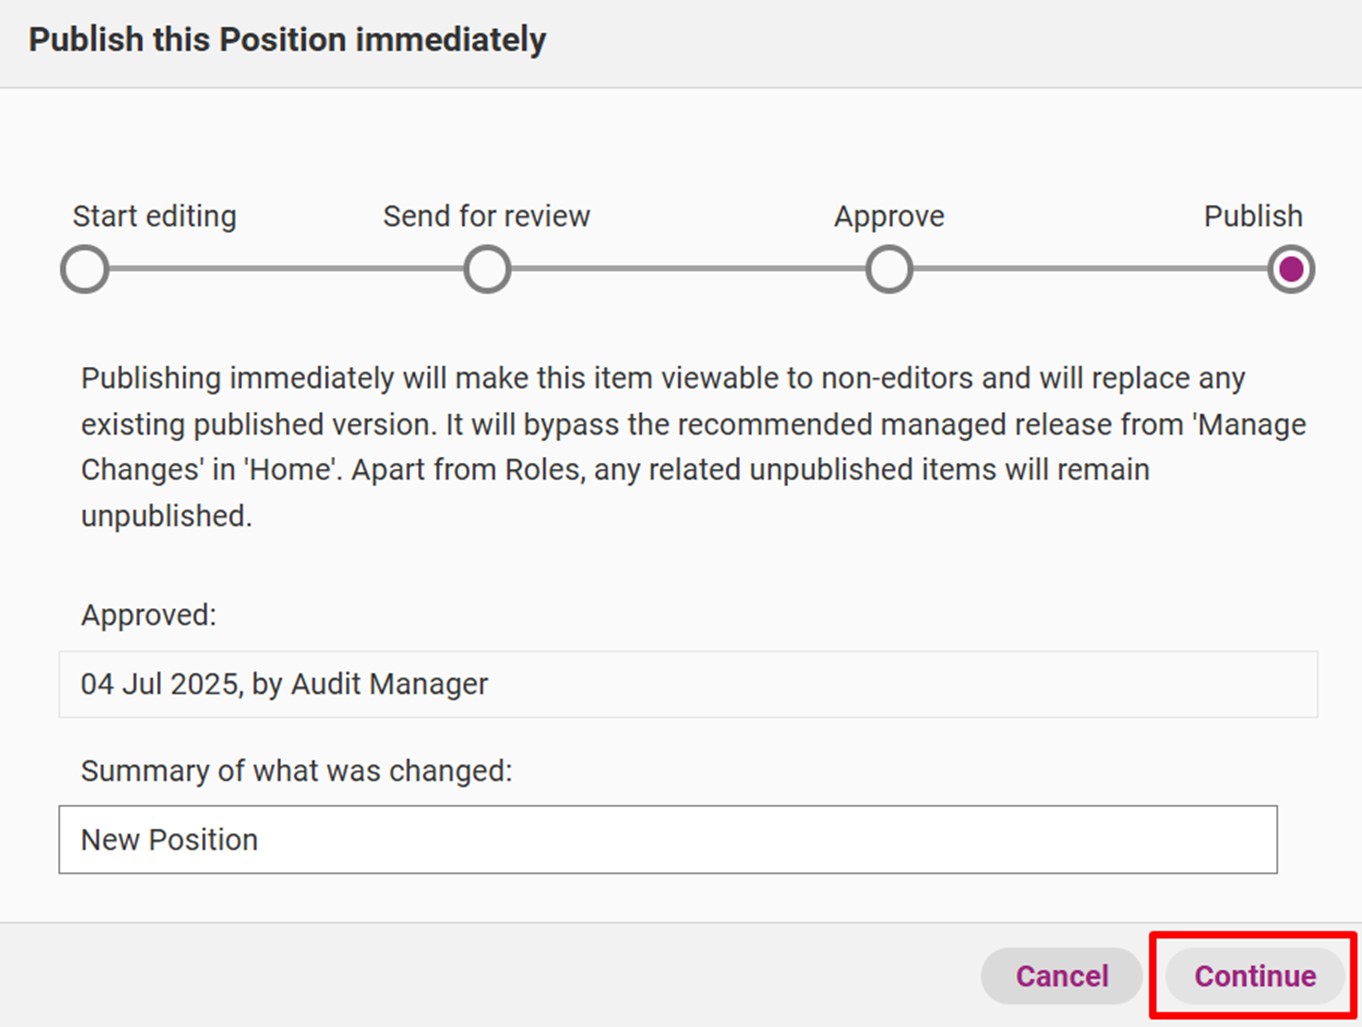
Click Publishing to officially publish latest version of that position. You also have the option to revert the position to a draft. Click Publish immediatelyto proceed with publication.

Step 8
When you confirm publication, a release management workflow will appear. You have the option to edit the summary of what was changed. Click Continue to publish the new position.
Step 9
The Release label and noteswindow appears. Write official release notes about the new position. You can edit the release notes later if required.
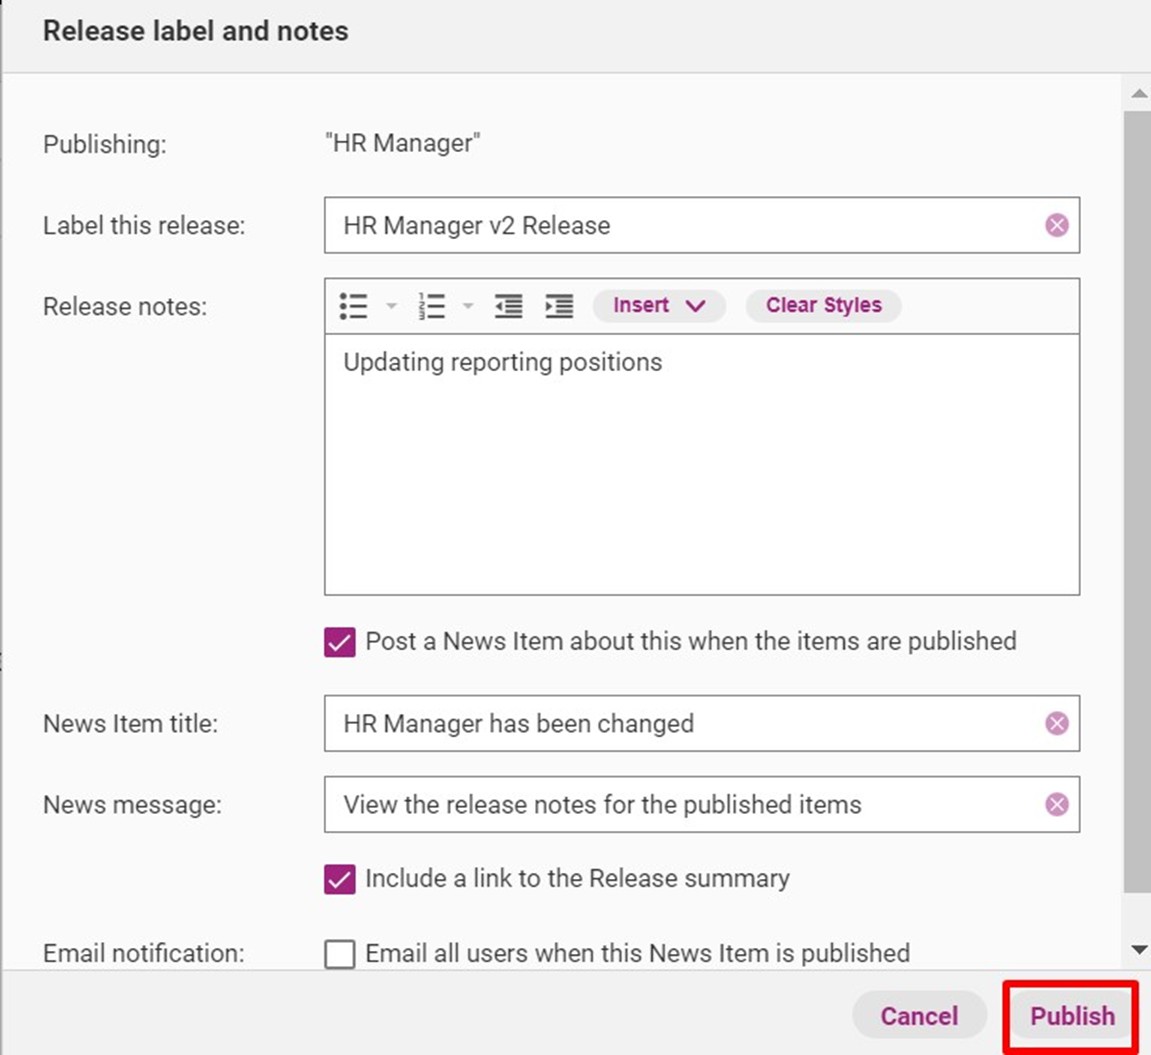
Field | Description |
|---|---|
Label this release | The official name of this release. |
Release notes | Details about what updates you have made. |
Post a news item about this when the items are published | If selected, you can post a news item on the Home tab to notify users about your content changes. |
News item title | Title of the news item that will appear in the Home tab. |
News message | The message that appears under the news item title. |
Include link in release summary | If selected, this option will allow you to include a link to the release notes for the item. |
Email all users when this News Item is published | If selected, all QMS users in your organisation (provided they have activated their account) will receive an email notification about the release at 5:30am AEDT/AEST the following day. |
Step 10
Click Publish.