General
Set up and configuration
Manage users
Troubleshooting
Registers
Manage content
- Delete document
- Edit, review and approve process
- Edit, review and approve policy
- Create and publish new policy
- Create and publish new process
- Previous item version information
- Edit roles
- Edit release notes
- Hide items (archive content)
- Introduction to release management
- Manage document
- Manage regulations
- Publish multiple changes (in one release)
- Publish single item (manage changes)
- Download and print content
- Delete role
- Delete policy
- Delete process
- Delete or archive regulation
Audits
Training Resources
Business units
- Guide new business unit set up
- Working example 1 - locking down content access to 2 separate items
- Working example 2 - want all staff to view content yet only one group can edit
- Existing business unit review and configuration
- Guide ongoing business unit maintenance
- Manage business units for registers
Reports
Required Reading
Work Instructions
Mobile Phone App
Comments
Create new role
User access level | Powers related to Required Reading |
|---|---|
Administrator | Can create and assign new staff roles |
Model Administrator | Can create new staff roles |
QMS administrators can create and assign new staff roles. A staff role can be a job title (e.g. human resources manager) or a broad indicator of responsibilities (e.g. office worker).
The purpose of Roles within the QMS are to:
- indicate responsibilities for process steps
- assign required reading to QMS users
To achieve these purposes Roles added to the QMS can be:
- attached to specific policies, processes and documents; and
- assigned to specific staff members that have an account on the QMS (i.e. Users)
Only users with certain QMS access levels can manage the functions of Roles. For instance, only Administrators can assign Roles to Users and only users with editing access can add Roles to content or process steps. Users with Process Viewing access are unable to make any changes related to Roles or view the Roles available on the system.
The QMS is pre-loaded with various Roles to allow process step responsibilities to be added to the processes. To make changes to these existing Roles, refer to Edit roles page.
Tip
The Ageing Australia Quality Team run regular group training sessions for QMS Administrators on Required Reading and Roles. Find the training schedule on the Upcoming Training Sessions page.
Create new role
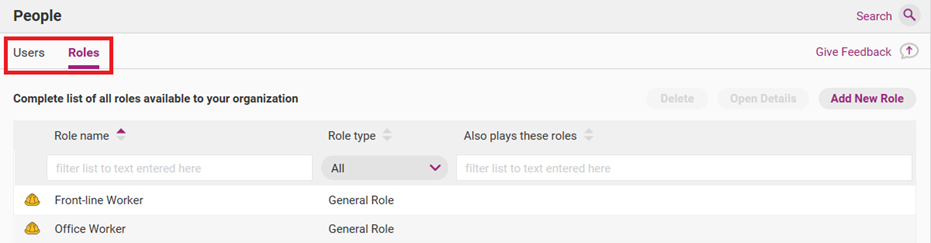
Step 1
Go to the People tab and access the Roles subtab.
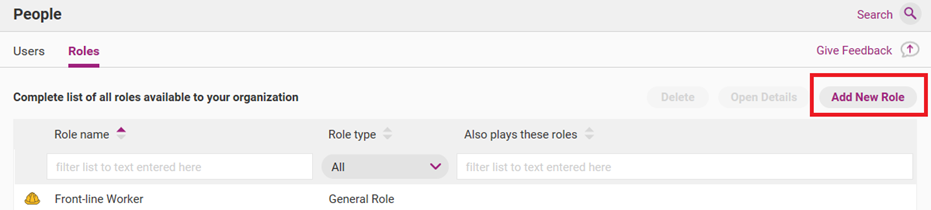
Step 2
Click Add New Role.
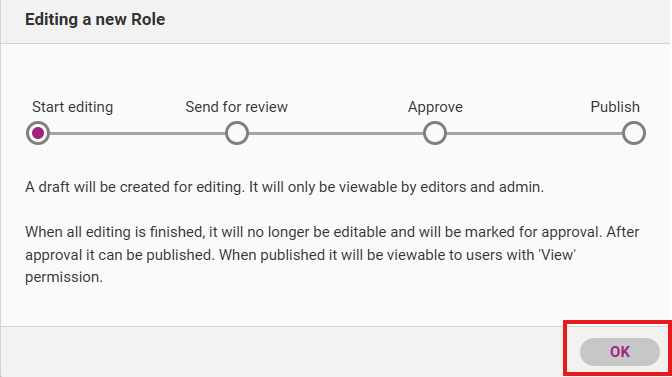
Step 3
Your release management workflow will appear. Click OK to start adding a role.
Step 4
Enter role name, description and select a role type. Click Save. The table below provides a summary of each section.
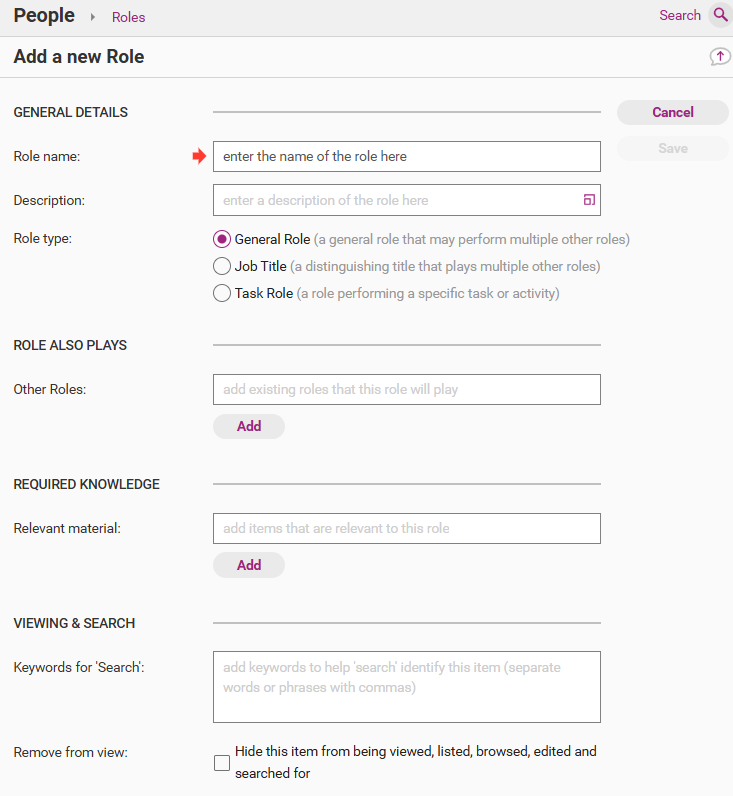
Field | Description |
|---|---|
Role name | The name of the role as it will be displayed. This is the only compulsory field. |
Description | A description of the role (e.g. the duties fulfilled by a person in that role, reporting hierarchy etc). |
Role type | The nature of the role. Note, there are no functional difference for the different role types. |
Other roles | Any other roles that are linked to the role. Completing this field is not a recommended field as this may impact required reading assignments. |
Relevant material | Content items which are linked to the role for the purposes of required reading. Refer to Assign Required Reading for more information. |
Keywords for search | Keywords for search purposes. Note this is not considered a necessary field. |
Remove from view | Tick box to move the role to Hidden Items for archiving purposes.
|
Approve and publish role
Step 1
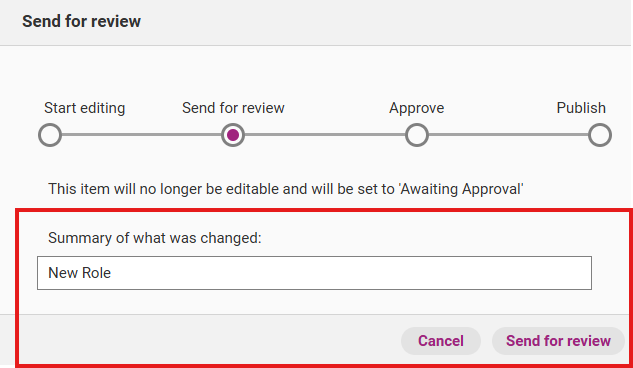
Click Send for review.

Step 2
Your release management workflow will appear. Write a summary of what was added and click Send for review. The new role is now ready to be approved.
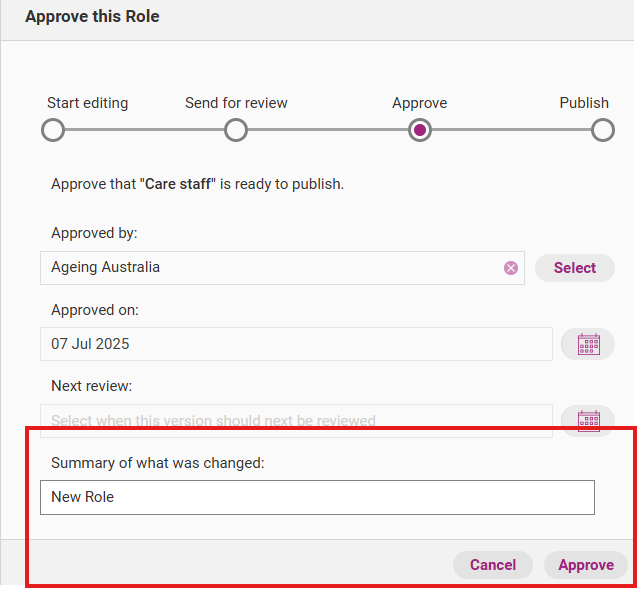
Step 3
If you agree with all the changes, approve the new role by clicking Approval. You will have the option to either approve the role or revert it to a draft (if you need to continue editing).

Step 4
Click Approve and your release management workflow will appear. You can edit the summary of what was changed.
Click Approve to confirm changes. The role will now be marked ‘Ready to Publish’.
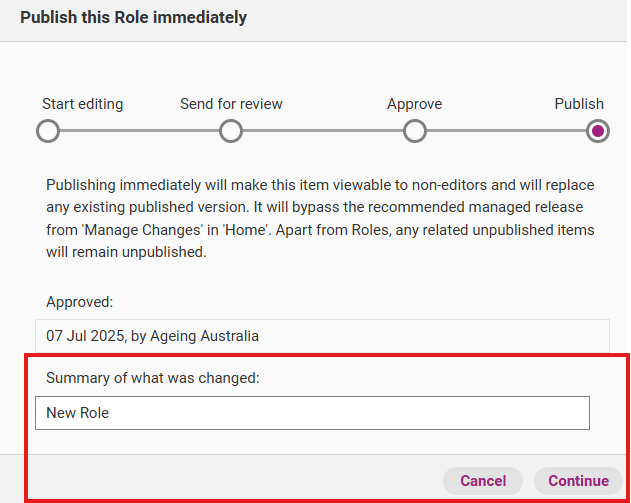
Step 5
Click Publishing to officially publish latest version of that role. You also have the option to revert the role to a draft.
Click Publish immediately to proceed with publication.
Important
You will not be able to edit any change summaries/release notes once the latest version is published.

Step 6
When you confirm publication, your release management workflow will appear. You have the option to edit the summary of what was changed. Click Continue to publish the new role.
Step 7
The release notes window will appear. Write official release notes about the new role.
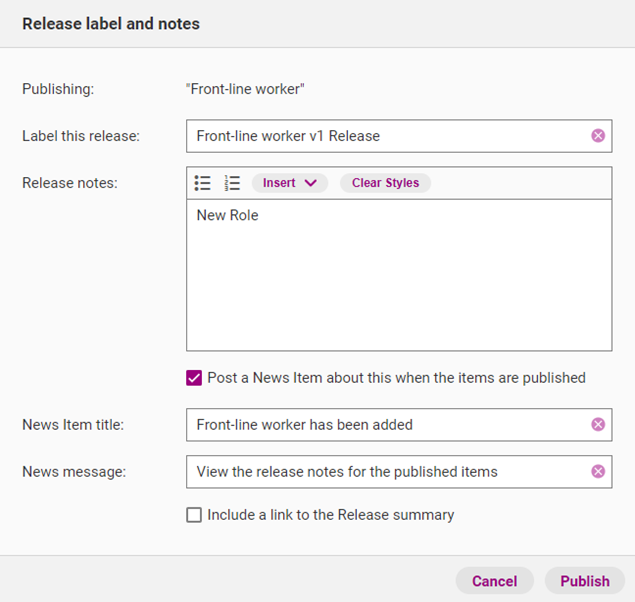
Field | Description |
|---|---|
Label this release | The official name of this release. |
Release notes | Details about what updates were made. |
Post a news item about this when the items are published | You can post a news item on the Home tab to notify users about the new role. |
News item title | Title of the news item that will appear in the Home tab. |
News message | The message that appears under the news item title. |
Include link in release summary | If selected, this option will allow you to include a link to the release notes for the item. |
Step 8
Click Publish to officially include the new role in the system. You will receive confirmation when the item is published.