General
Set up and configuration
Manage users
Troubleshooting
Registers
Manage content
- Delete document
- Edit, review and approve process
- Edit, review and approve policy
- Create and publish new policy
- Create and publish new process
- Previous item version information
- Edit roles
- Edit release notes
- Hide items (archive content)
- Introduction to release management
- Manage document
- Manage regulations
- Publish multiple changes (in one release)
- Publish single item (manage changes)
- Download and print content
- Delete role
- Delete policy
- Delete process
- Delete or archive regulation
Audits
Training Resources
Business units
- Guide new business unit set up
- Working example 1 - locking down content access to 2 separate items
- Working example 2 - want all staff to view content yet only one group can edit
- Existing business unit review and configuration
- Guide ongoing business unit maintenance
- Manage business units for registers
Reports
Required Reading
Work Instructions
Mobile Phone App
Comments
Edit, review and approve process
QMS users with the appropriate level of access can make changes to processes. The table below explains the powers of the different access levels in editing processes.
User access level | Powers related to process editing |
|---|---|
Administrator Model Administrator | Can edit all aspects of processes as well as approve and publish changes |
Process Editor | Can edit all aspects of processes |
Process Step Editor | Can edit only the steps of processes |
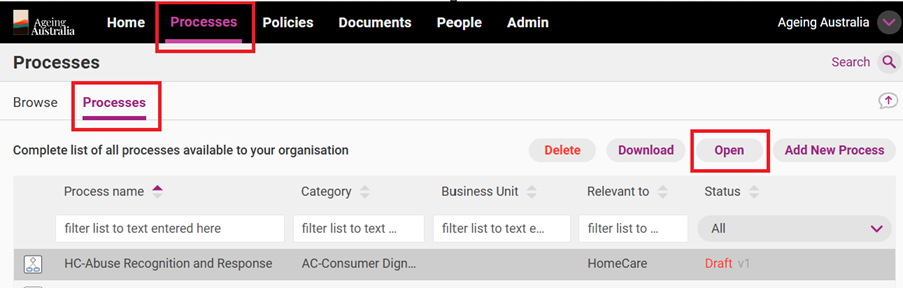
Open process
To open a process, access the Processes tab and click the Processes subtab, select the process you want to edit and click Open.
If you have opened a process that has no additional drafts waiting to be approved, published or deleted, a variety of editing options are available.
Important
If the process already has a draft version (or a version that is awaiting approval/publication) please open this version to edit NOT the older published version. You will not be able to create a second draft by opening the published version.
Finding editing options
Please note that the location of your editing options depend on how you have chosen to view your process. Processes have three views available:
- Step-by-step (designed for operational staff)
- All Steps (designed for managers/administrators)
- Map (workflow view of process)
Once you have selected a process, you can navigate the tabs to view it in different ways.

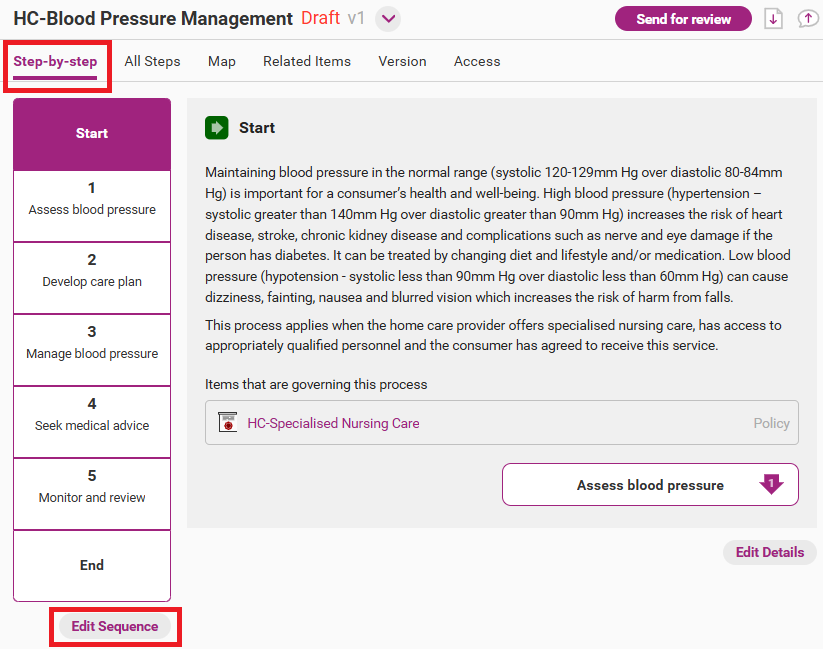
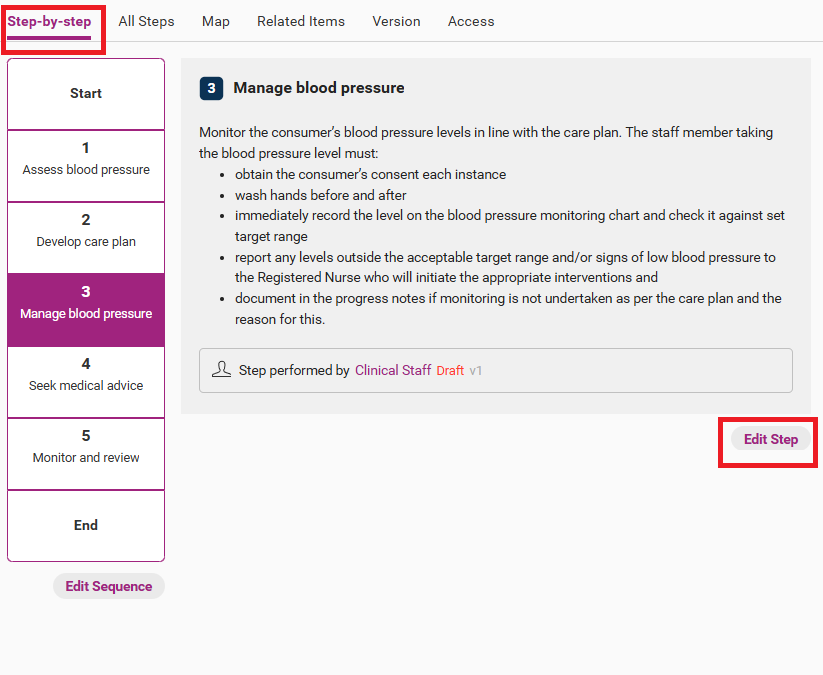
Step-by-step view
Step-by-step view tab allows you to navigate each step of your process in an interactive way. You can use the navigation bar on the left to view the steps in any order or click the arrow at the bottom of the step you are currently viewing to proceed to the next step.
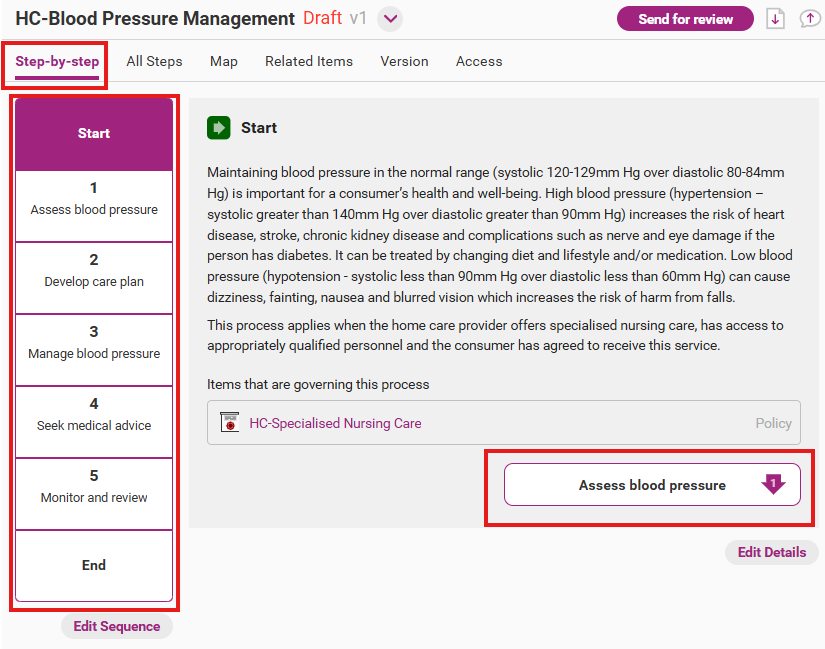
When you are viewing a step, the editing options, are located as shown:
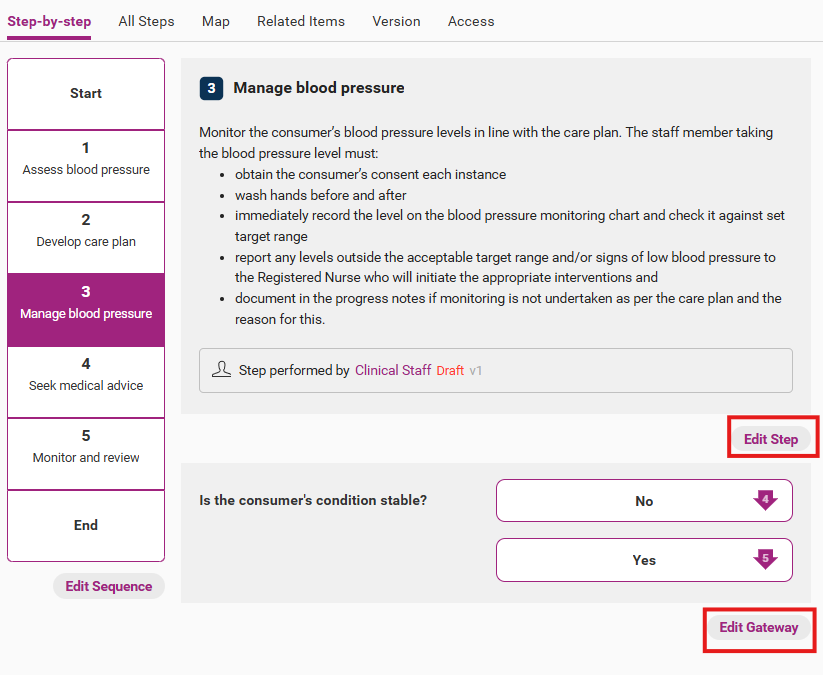
When you view one of the steps, you will also get the option to view edit a step. If the step is followed by a gateway point (as shown below), you will also get the option to edit a gateway point.
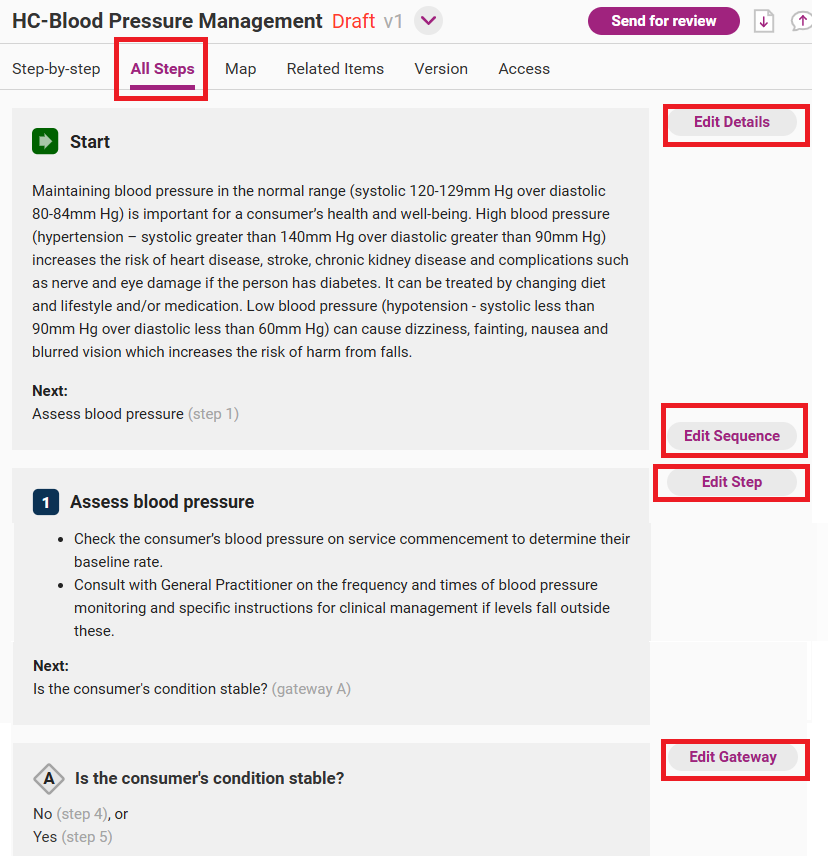
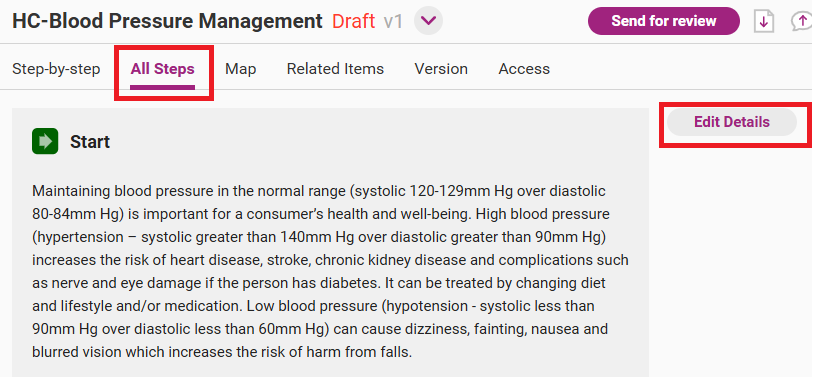
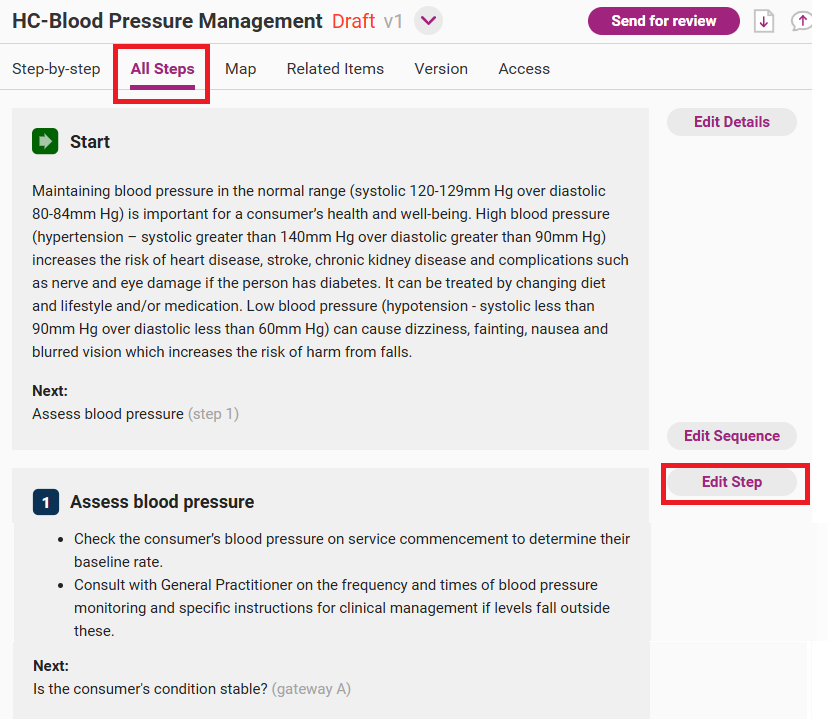
All steps view
By using All Steps view, you can view your whole process on a single page. All relevant editing options will be located on the right side.
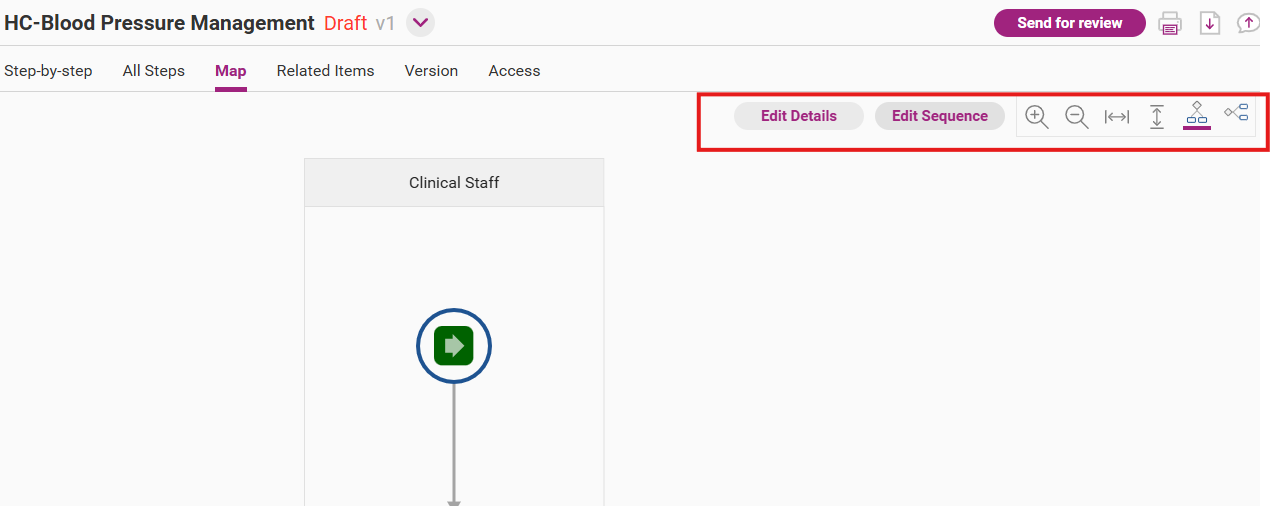
Map view
Map view allows you to view your process as a map. You can click on each step to view more details about the step, including the instructions.
The editing options are located on the upper right side. You can also use the icons next to the editing options to view the map horizontally or vertically.
Start editing
Step 1
To access your editing options, click Start Editing.

Step 2
A release management workflow appears. It gives you guidance for all the steps you need to take to publish a new version of your process. You can write a summary of what you intend to change.
Click OK to start editing.
This makes a new draft version of your process and you can start editing the content.
Please note: when the process is in a draft or approved state (and before it is published), it will be a duplicate of the latest published version of the same process. Until you publish the draft, you will see two different items with the same name when you view all your processes in list view. When you publish the draft, only the latest version will be available (that is, there will no longer be a duplicate).
Editing options
You can edit different parts of a process:
- Edit Sequence
- Edit Details
- Edit Steps.
The editing options available to you differ depending on the part of the process that you choose to edit.
Edit Sequence
This option allows to edit your process map; that is, the sequence of the steps and gateways in the process.
Step 1
Open the edit sequence page from the draft version of the process by clicking on Edit Sequence.
Depending on the view you have open for the process, this can be found in the following ways.
- All Steps view – found next to the Start of the process.
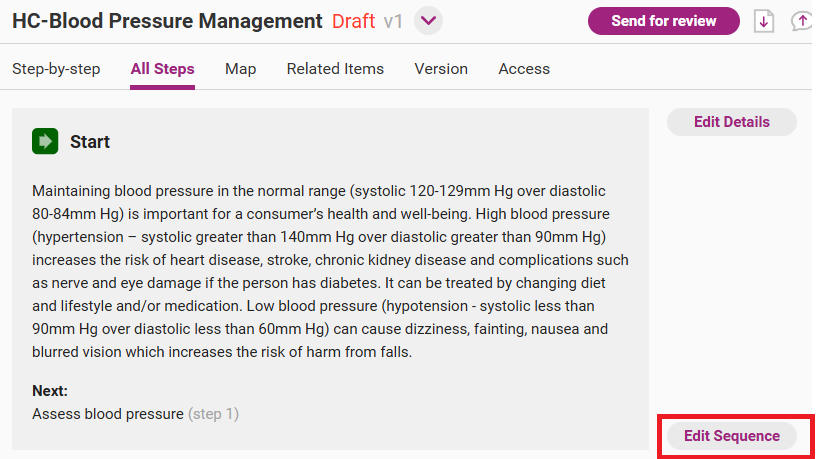
- Step-by-step view – found under the contents table on the left side of the screen.
- Map view – at the top of the page above the map.

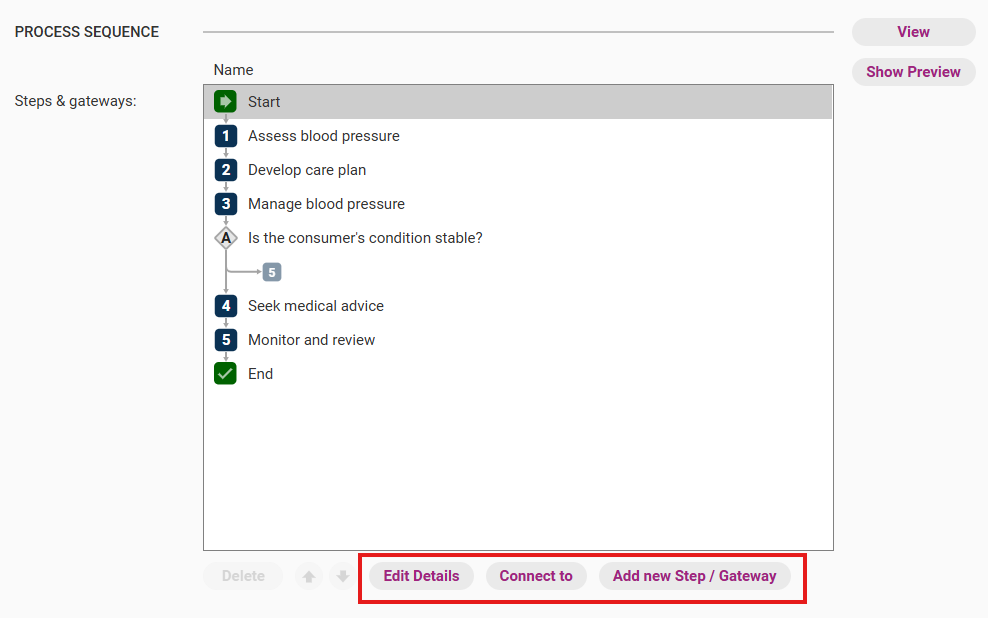
Step 2
A new screen will emerge showing the process sequence editing tools.
This edit option allows you to:
- Delete a step using Delete
- Change the order of the steps using the arrows
- Change the connections between steps and decision points using Connect to
- Add a new step/ gateway (this is the option that allows you to add a new process step or gateway).
Step 3
Press save when you have finished editing.
Tip
When changing the sequence of a process, it is important to make sure that each step/ gateway connects to the right place. We recommend referring to our training video Process editing – editing the process sequence for more information on how to do this properly.
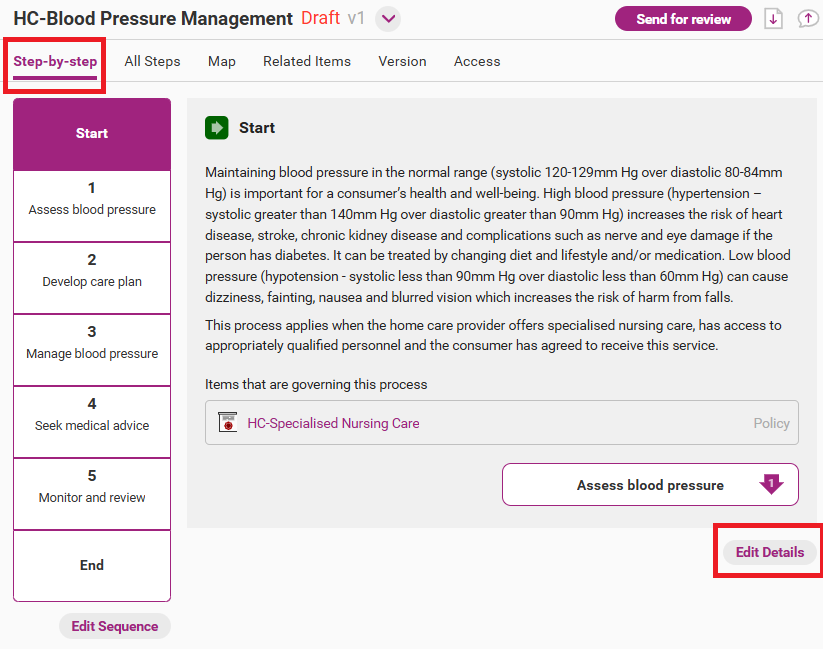
Edit Details
With this option, you can edit the core information about the process as well as how the process links and interacts with other content within your QMS.
Depending on the view you have open for the process, this can be found in the following ways.
Step 1
Open the edit sequence page from the draft version of the process by clicking on Edit Sequence.
Depending on the view you have open for the process, this can be found in the following ways.
- All Steps view – found next to the Start of the process.
- Step-by-step view – found under the contents table on the left side of the screen.
- Map view – at the top of the page above the map.

Step 2
The edit details page will open with various editable fields. The table below summarises each field. Click into each field to make edits as required.
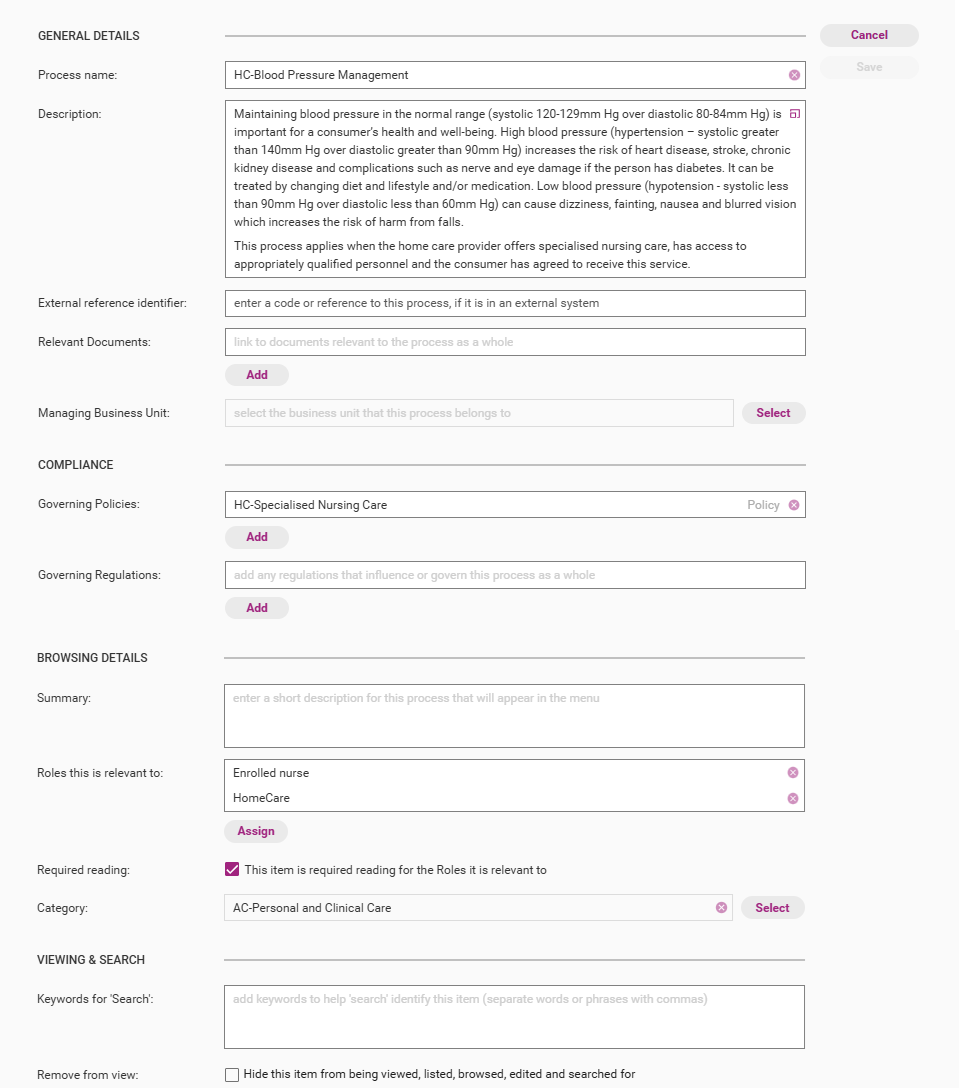
Field | Description |
|---|---|
Process name | The title of the process. This is the only compulsory field. |
Description | The introduction of the process. This appears at the process start point. |
External reference identifier | An identification code/number for the item. This can be used if the item is being migrated from a different system or if a system of identifiers is required. This field is optional. |
Relevant documents | Documents that are related to the process. These documents must first be uploaded to your QMS. |
Managing Business Unit | The Business Unit that manages this piece of content (applies only if you have Business Units implemented and wish to have visibility of the process restricted to users affiliated with the Business Unit) |
Governing policies | Policies or policy sections related to the process. |
Governing regulations | Regulations related to the process. |
Related risks | Risks related to the process (only applicable for QMS with risks and controls enabled) |
Related controls | Controls related to the process (only applicable for QMS with risks and controls enabled) |
Summary | This is the short description that appears in the browsing menu. |
Roles this is relevant to | The work roles and people to which the process is related (e.g. Support Worker) (note this only needs to be updated if you intend to set the process as required reading for those roles. Refer to Assign Required Reading page for more information) |
Category | The group to which the process belongs. (note, the QMS content is loaded to be categorised according the Aged Care Quality Standards, ARVAS standards and/or NDIS Standards. Refer to Manage Categories page for more information) |
Required reading | Tick this box to make this item required reading for all roles to which the item is relevant. |
Keywords for 'Search' | Keywords that, when searched in the QMS, will make the item come up in search results (note all text within the body of the process will be searched through as part of the search function so this section can be used to include abbreviations or other terms which are not found in the process itself) |
Remove from view | Tick the box to hide the item. This will make the item only visible to users with Administrator permissions. Hidden items will:
Refer to Hide Items for more information. |
Tip
You can format the text, add images, special characters, external links, and link items from QMS. See section “Editing Tools” at the end of article.
Step 3
Click Save when you are done editing to commit the changes.

Edit Step
By using this option, you can change information about each process step.
Step 1
Open the edit step page from the draft version of the process by clicking on Edit Step next to the step you wish to edit. If editing the entire process, you will need to open each step separately to edit.
Depending on the view you have open for the process, this can be found in the following ways.
- All Steps view – on the right-hand side of each step.
- Step-by-step view – click on the step you wish to edit, then edit step can be found underneath the step’s text.
- Map view – the edit step page can be found by clicking edit sequence then double clicking on a step in the sequence field.
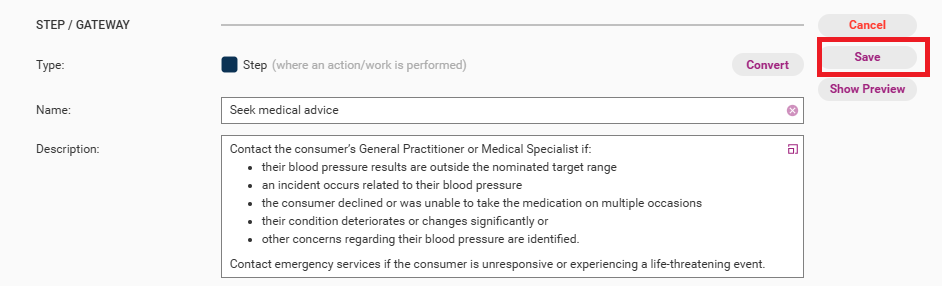
Step 2
The edit step page will open with various editable fields. The table below summarises each field. Click into each field to make edits as required.
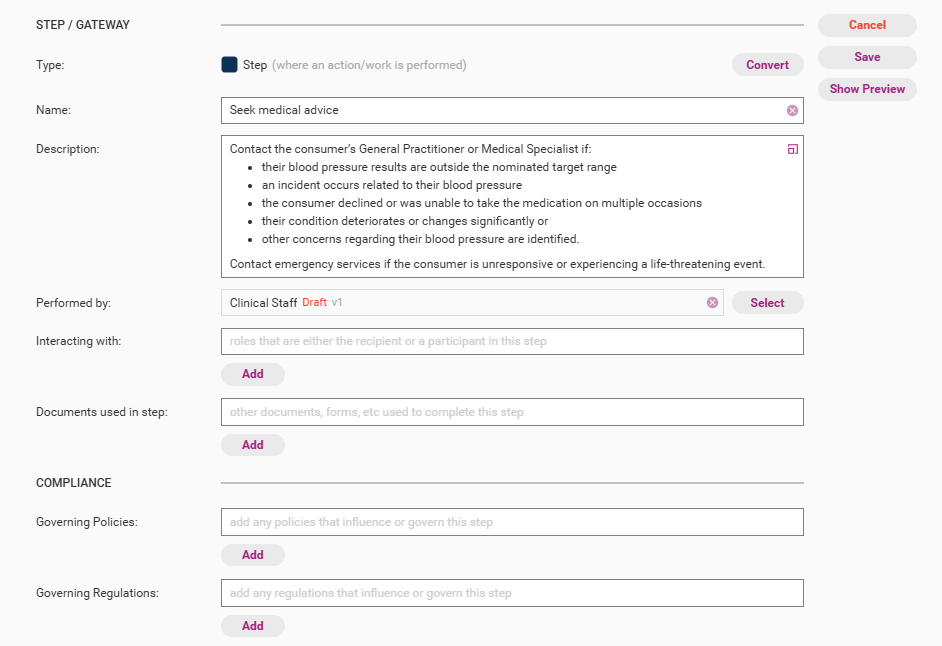
Field | Description |
|---|---|
Type | You can make this section either a step or a gateway point. Please note: the first step cannot be a gateway point. |
Name | The title of the step. This is a compulsory field. |
Description | The instructions for completing the step. |
Performed by | Roles, organisations and/or people that are responsible for the step. This is a compulsory field. Refer to Create New Role for more details. |
Interacting with | Secondary roles that are involved in executing the step. |
Documents used in step | Documents that are relevant to this step. |
Governing policies | Regulations that link to the process step. |
Related risks | Risks related to the process (only applicable for QMS with risks and controls enabled) |
Related controls | Controls related to the process (only applicable for QMS with risks and controls enabled) |
Tip
You can format the text, add images, special characters, external links, and link items from QMS. See section “Editing Tools” at the end of article.
Step 3
Click Save when you are done editing to commit the changes.
Gateway Prompt
With this option, you can edit the gateway prompt text; that is, the question being asked at the Gateway point.
Step 1
To open the gateway editing field, follow the same steps as shown above in the edit steps section.
Step 2
You can make changes to the prompt text by typing in your new question.
Step 3
Click Save when you are done to commit the changes.

Approve and publish new process version
Once you have completed all changes you need to approve your process and confirm publication. QMS Administrators and Model Administrators can approve and publish processes.
Step 1
Click Send for review.

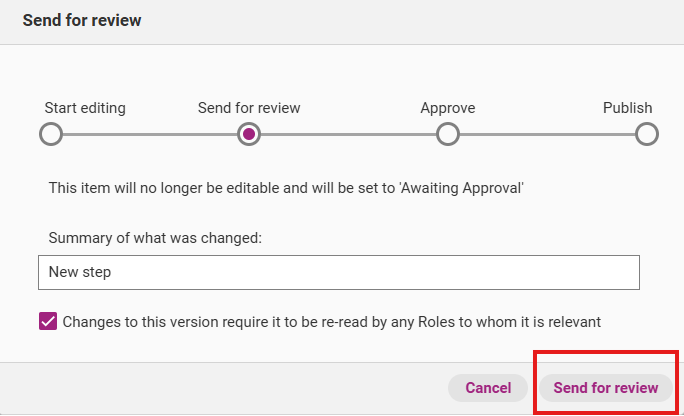
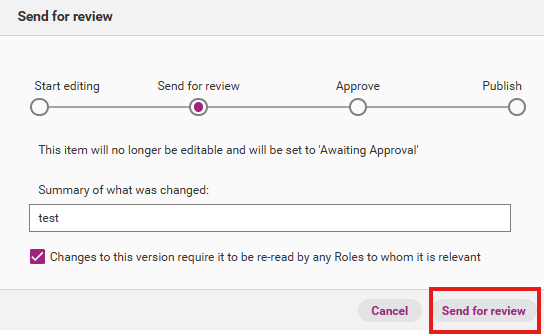
Step 2
The release management workflow appears. Write a summary of what was changed and click Send for review. The new process version is now ready to be approved.
Step 3
If you agree with all the changes, click Approval to approve a new process version. You have the option to either approve the process or revert it to a draft.

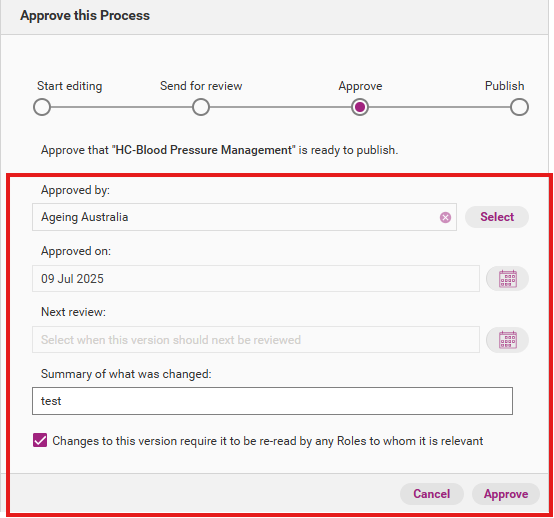
Step 4
When you click Approve, a release management workflow appears. You can edit the summary of what you changed. You also have the option to select who approved the item, the date on which it was approved as well as the next review date.
Click Approve to confirm changes.
Step 5
After you have approved the new process version, it will be marked ‘Ready to Publish’. You can now publish it as the latest version of that process. You also have the option to revert the process to a draft.
Step 6
To publish the new process version, click Publishing. At this stage, you can still revert the process to a draft to make further changes.
When you have finished all editing, click Publish Immediately.

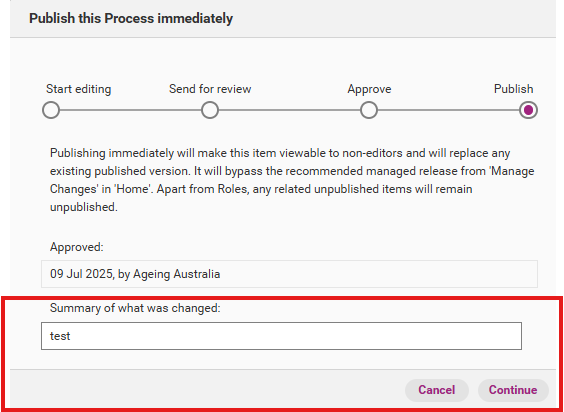
Step 7
When you confirm publication, a release management workflow appears. You have the option to edit the summary of what was changed.
Click Continue to publish the new process version.
Step 8
The release label and notes windows will appear. Write official release notes about the new process version. You can edit the release notes later if required. The below table provides a summary of each field.
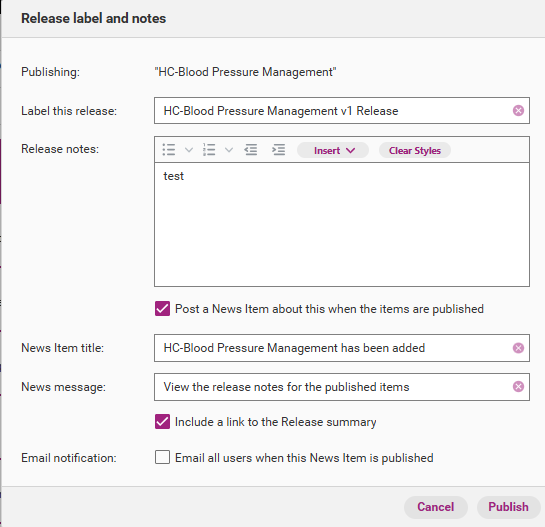
Field | Description |
|---|---|
Label this release | The official name of this release. |
Release notes | Details about what updates were made. |
Post a news item about this when the items are published | You can post a news item on the Home tab to notify users about the new role. |
News item title | Title of the news item that will appear in the Home tab. |
News message | The message that appears under the news item title. |
Include link in release summary | If selected, this option will allow you to include a link to the release notes for the item. |
Email all users when this News Item is published | If selected, all QMS users in your organisation (provided they have activated their account) will receive an email notification about the release at 5:30am AEDT/AEST the following day. |
Tip
You can format the text, add images, special characters, external links, and link items from QMS. See section “Editing Tools” at the end of article.
Step 9
Click Publish to officially release the new process version. You will receive confirmation when the item is published. It is now visible to all users.
Editing Tools
You can format the text by using following options.
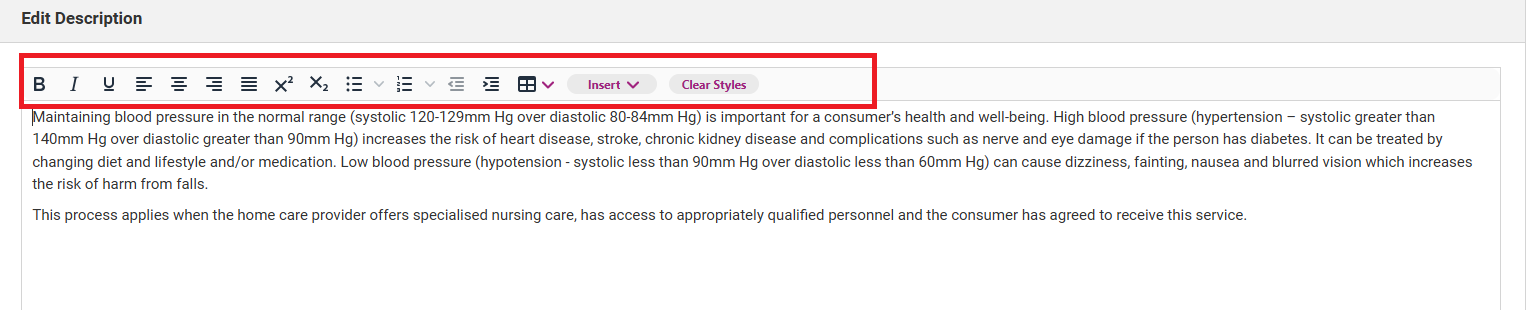
When you click on Insert. It gives you different options to add.

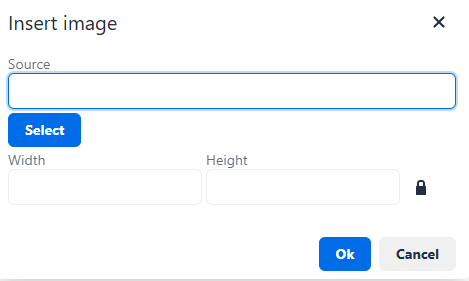
Insert Image
You can add an image from your device.
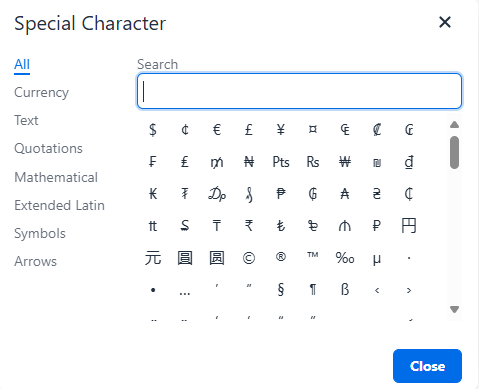
Insert Special characters
You can add any special character.
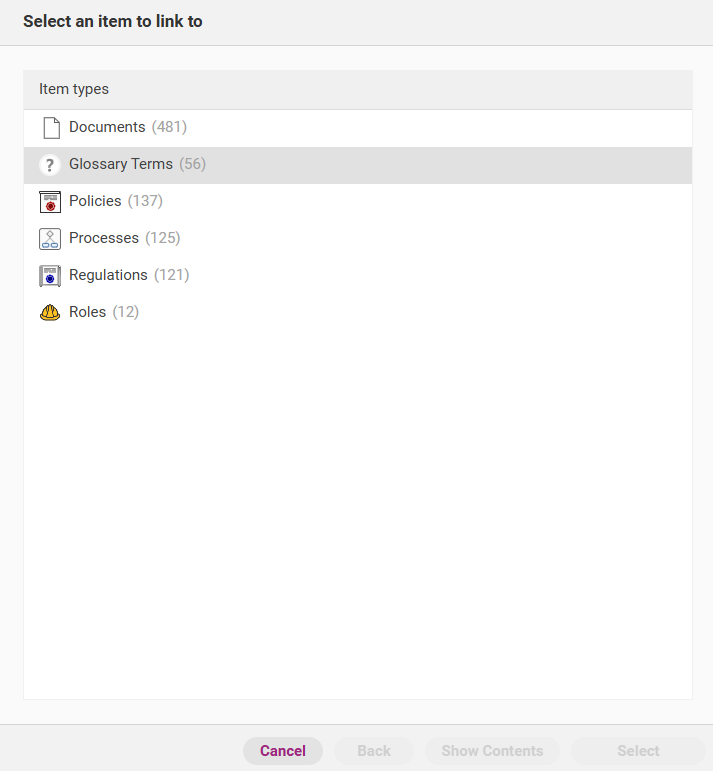
Link to Item
You can add any item (document, policy, process) from the QMS
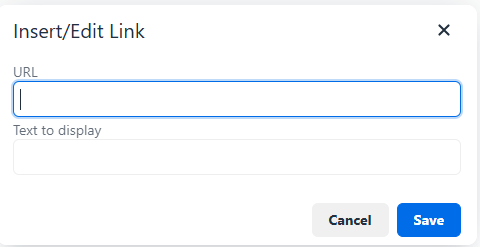
External Link
You can add any other external reference link.