General
Set up and configuration
Manage users
Troubleshooting
Registers
Manage content
- Delete document
- Edit, review and approve process
- Edit, review and approve policy
- Create and publish new policy
- Create and publish new process
- Previous item version information
- Edit roles
- Edit release notes
- Hide items (archive content)
- Introduction to release management
- Manage document
- Manage regulations
- Publish multiple changes (in one release)
- Publish single item (manage changes)
- Download and print content
- Delete role
- Delete policy
- Delete process
- Delete or archive regulation
Audits
Training Resources
Business units
- Guide new business unit set up
- Working example 1 - locking down content access to 2 separate items
- Working example 2 - want all staff to view content yet only one group can edit
- Existing business unit review and configuration
- Guide ongoing business unit maintenance
- Manage business units for registers
Reports
Required Reading
Work Instructions
Mobile Phone App
Comments
Delete document
QMS Administrators, Model Administrators and Editors have the ability to delete documents.
Document deletion within release management will be subject to a workflow similar to that which determines content editing and creation.
Important
Once approved and confirmed, all deletions are permanent. You will also not be able to edit any change summaries/release notes once the deletion is published.
For this reason, we do not recommend deleting document templates or other content. Instead consider archiving the item by moving it to Hidden Items. Refer to Hide Items page for more information.
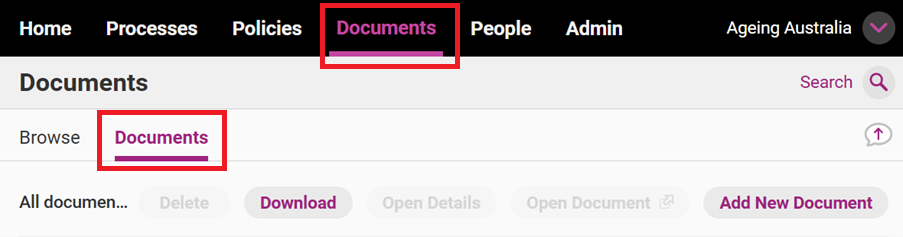
Step 1
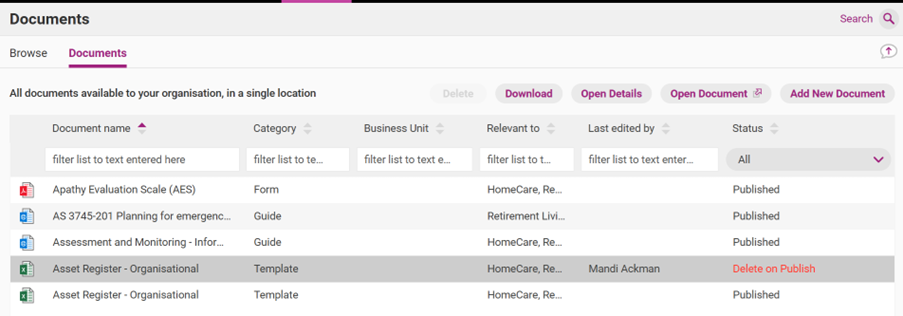
Click the Documents tab and access the Documents subtab.
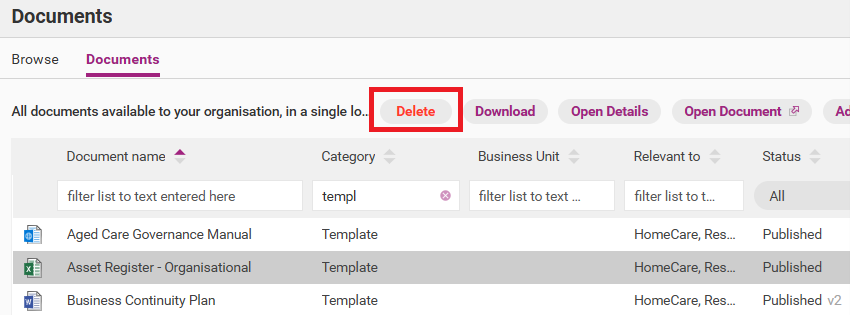
Step 2
Click on the item you want to delete and click Delete.
Tip
If the document is in a draft state (i.e. marked ‘Draft’, ‘Awaiting Approval’ or ‘Ready to Publish’), clicking Delete will remove the draft version without activating the deletion workflow. The live published version will not be deleted and cannot be deleted until the draft version is removed.
You will not be able to delete a published version of a document if it has a newer copy that is:
- in a draft state
- awaiting approval
- marked as ‘ready to publish’
already marked for deletion.
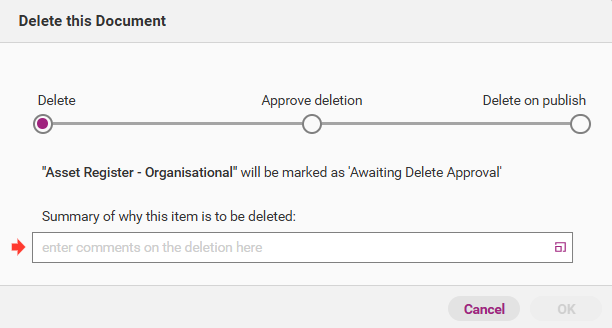
Step 3
Your release management workflow will appear. Give a summary of why you are deleting the document and click OK.
Step 4
Your item will now be marked ‘Awaiting delete approval’. Only QMS Administrators and Model Administrators can approve and publish the deletions.
To approve the item for deletion, click on the item in the list, and click Open details.
Do not double click the item, as this will download the document.

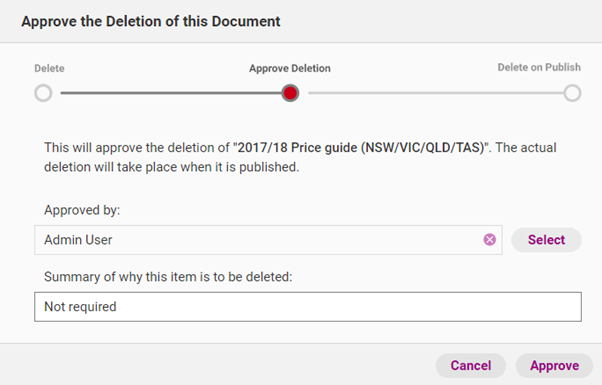
Step 5
Click Approval to see your options.
At this stage, you can still reverse the deletion. Click Revert (Don’t Delete) if you want to do so.
If you want to proceed with the deletion click Approve Deletion.

Step 6
Your release management workflow will appear. Edit your summary (if required) and click Approve.
Step 7
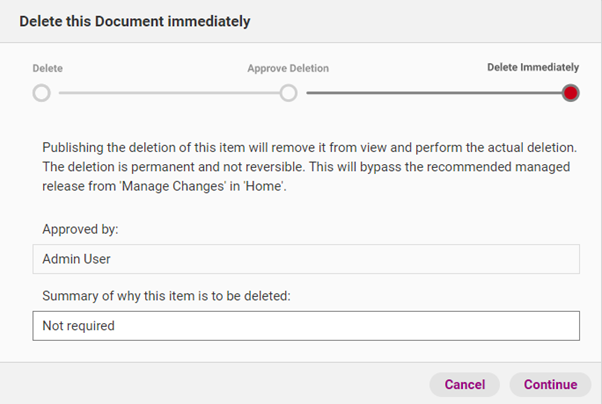
When you have approved the deletion, you can permanently delete your item. The item will be marked ‘Delete on Publish’. Click Open Details again for the draft version, not the published version.
Step 8
Click Publishing to see your options. At this stage, you can still reverse the deletion. Click Revert (Don’t Delete) if you want to do so. If you want to proceed with the deletion click Delete Immediately.

Step 9
Your release management workflow will appear. Edit your summary (if required) and click Continue.
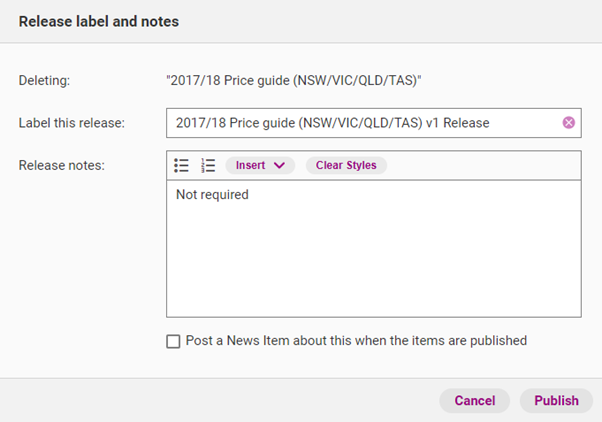
Step 10
Write release notes for the deletion. Release notes are the official overview of all your changes and updates.
Field | Description |
|---|---|
Label this release | The official name of this release. |
Release notes | Details about what updates were made. |
Post a news item about this when the items are published | You can post a news item on the Home tab to notify users about the new role. |
News item title | Title of the news item that will appear in the Home tab. |
News message | The message that appears under the news item title. |
Include link in release summary | If selected, this option will allow you to include a link to the release notes for the item. |
Step 11
Click Publish to permanently delete the item.